How to Draw a Beaver in Six Easy Steps
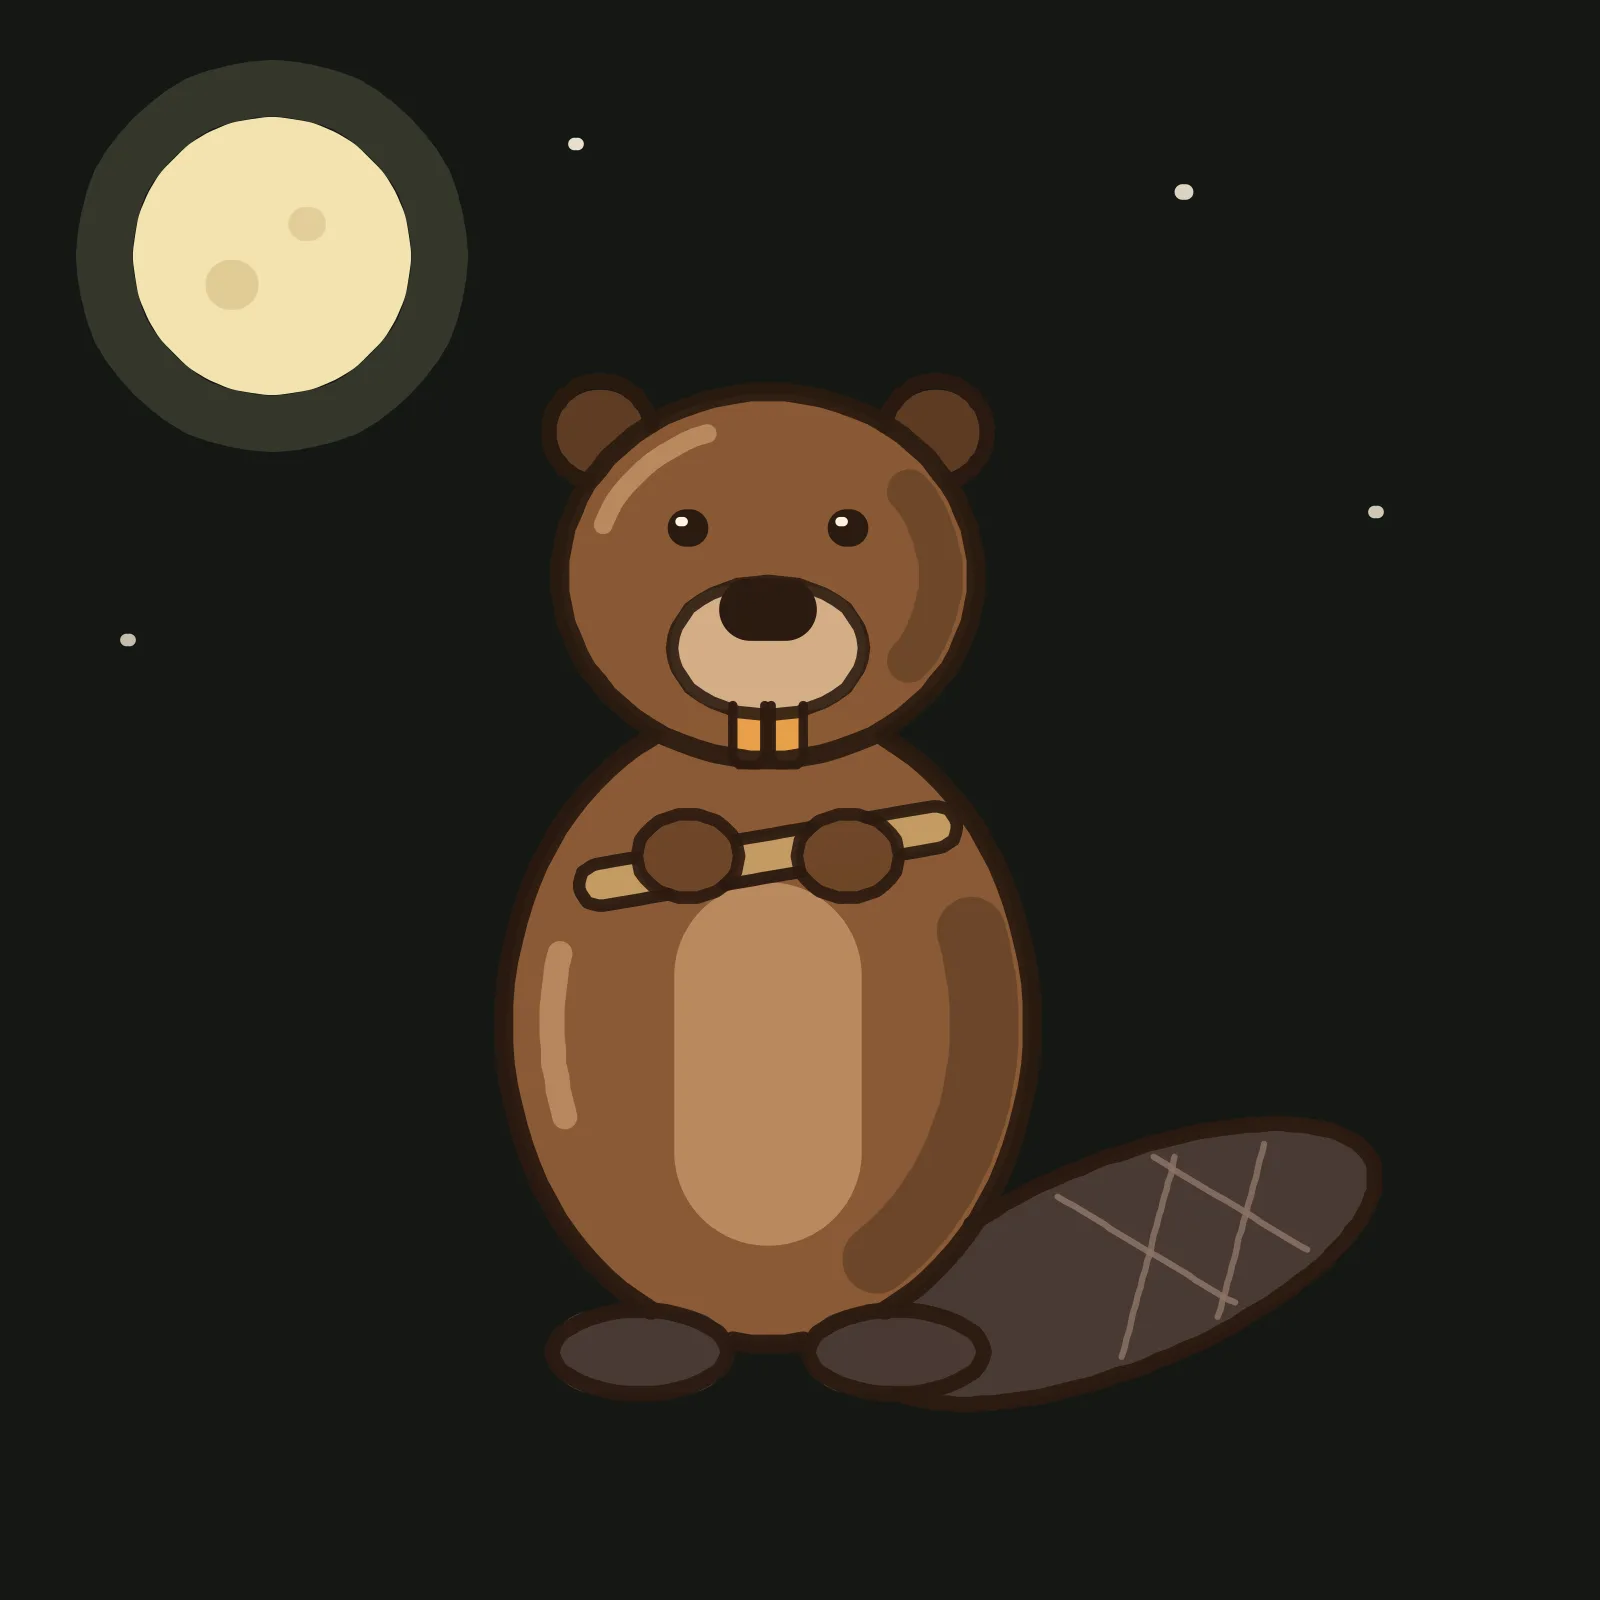
November's full moon is the Beaver Moon, and it rises on Tuesday 24 November 2026, so this week we are drawing the animal it is named after. A beaver is a friendly first animal because it is almost all round shapes, and two things make it read as a beaver and not a bear: a flat crosshatched paddle tail lying out to one side, and two big front teeth under a round muzzle.
What you need
You need the Grovetracks editor on its default dark canvas: the ellipse tool for the shapes, the line tool for guides, the freehand brush for outline and colour, and layers. Steps 1 to 3 go on the layer the editor starts you on, your sketch layer; in step 4 you draw on a new layer and delete the sketch layer whole instead of erasing it. Every colour is in the table below, with the hex code to type into the colour picker.
| Colour | Hex | Step | Used for | |
|---|---|---|---|---|
| Grey blue pencil | #93A6BC |
1, 2 | Shapes and guides (sketch layer) | |
| Warm cream | #F2E3C6 |
3 | First outline (sketch layer) | |
| Tail charcoal | #4A3A34 |
4 | Tail and back feet | |
| Beaver brown | #8A5A36 |
4 | Body and head | |
| Belly tan | #B98A5E |
4 | Belly | |
| Ear brown | #5E3C24 |
4 | Ears | |
| Muzzle cream | #D4AE86 |
4 | Muzzle | |
| Tooth orange | #E8A04A |
4 | Front teeth | |
| Wood | #C49A62 |
4 | Stick | |
| Paw brown | #6E4628 |
4 | Front paws | |
| Near black brown | #2B1A10 |
4 | Final outline, nose and eyes | |
| Soft grey brown | #8C7466 |
4 | Crosshatch on the tail | |
| Shadow brown | #4E321E |
5 | Body and head shadow, about 50% opacity | |
| Pale tan | #C99A6E |
5 | Highlights on the left | |
| Warm white | #FFF4E0 |
5, 6 | Eye dots and stars | |
| Moon cream | #F3E2B0 |
6 | Moon, and its glow at about 15% opacity | |
| Crater gold | #DCC690 |
6 | Two craters, about 75% opacity |
Step 1: Draw three ovals
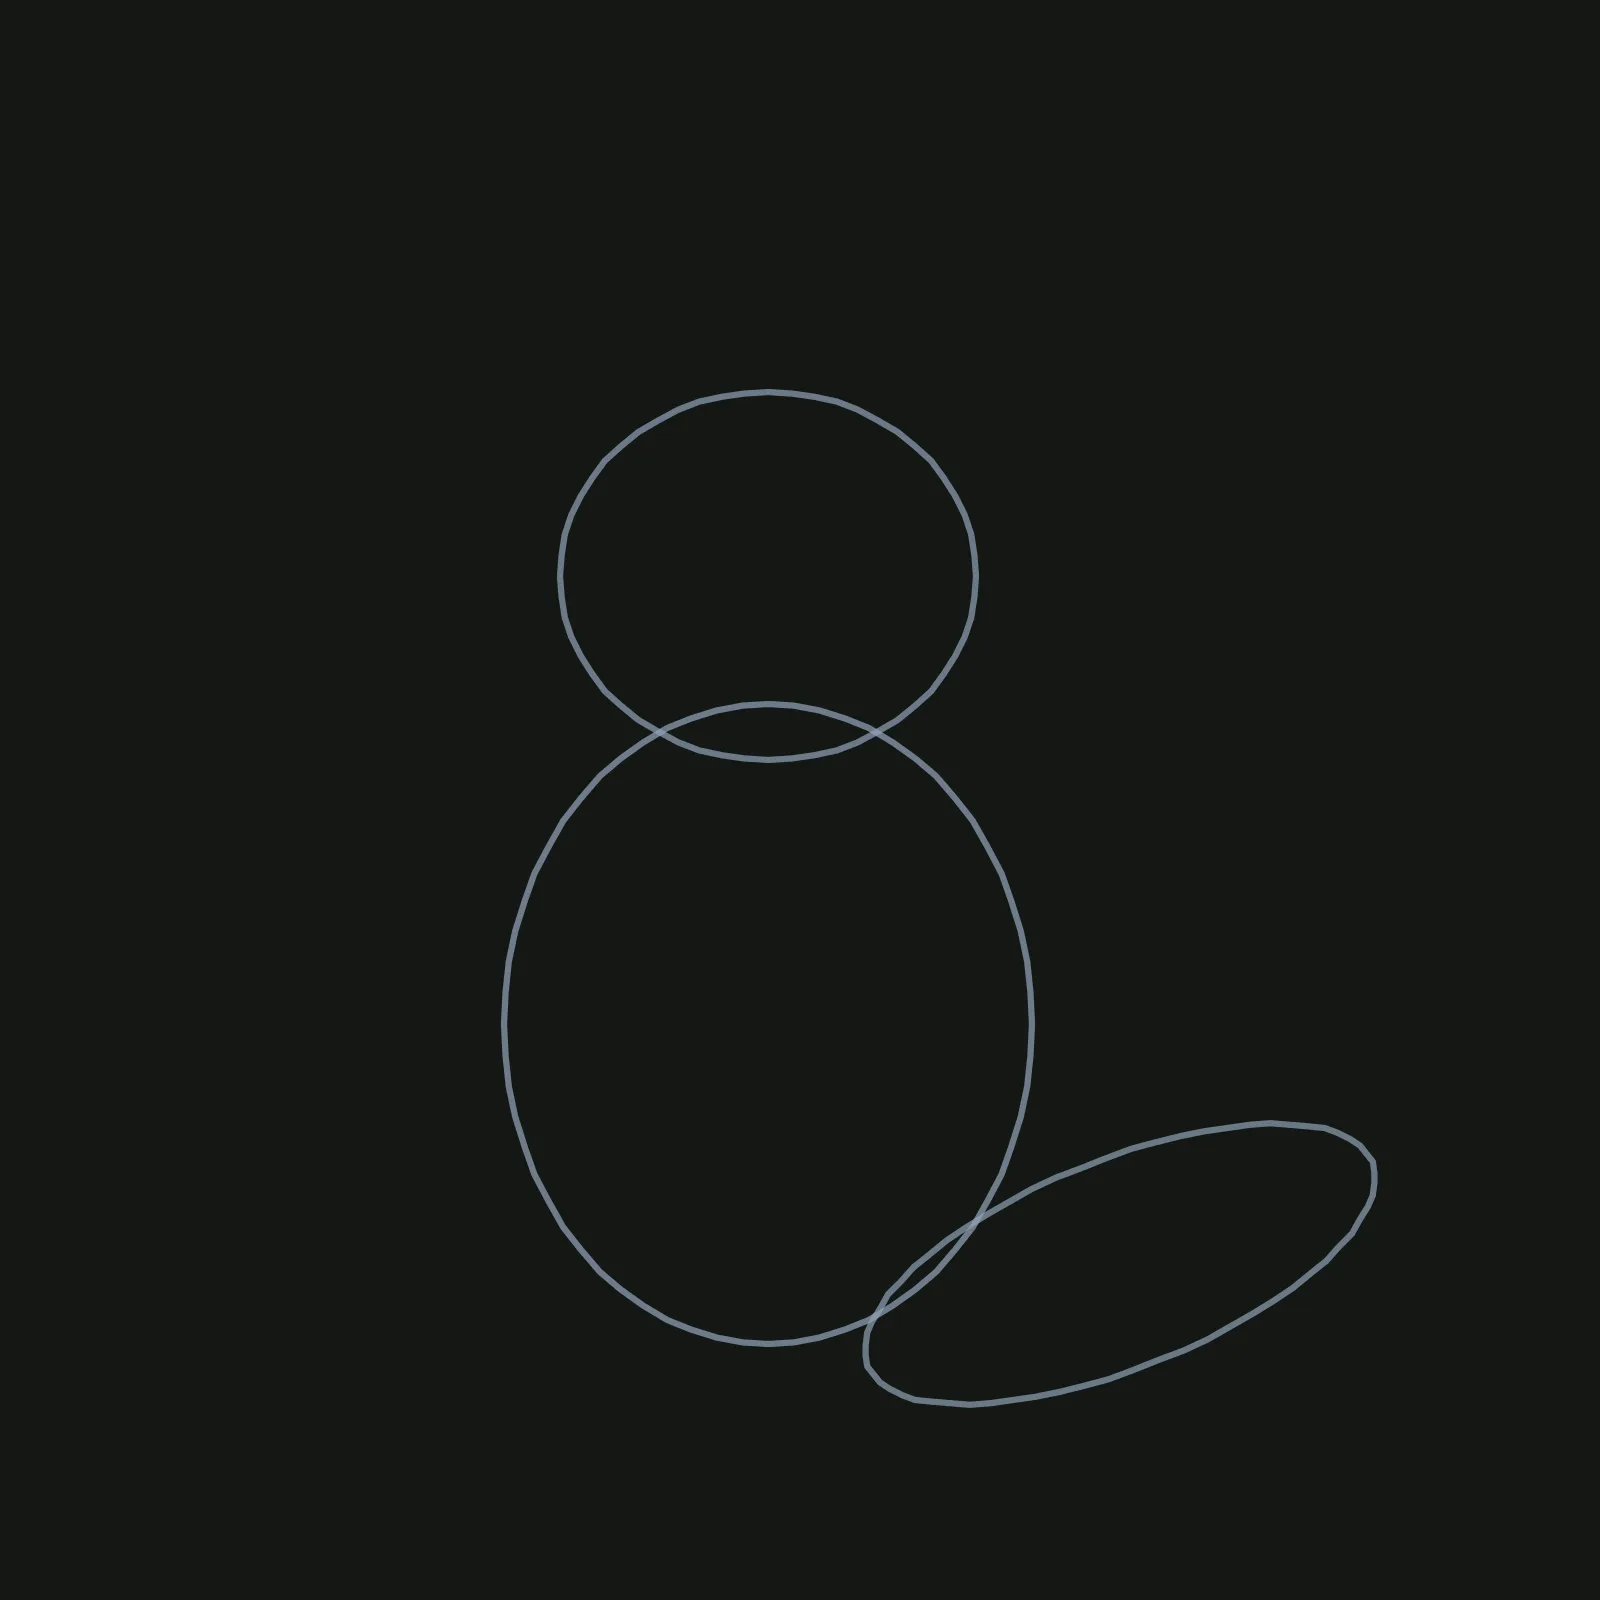
With the ellipse tool at width 2, draw a tall oval for the body, about a third of the canvas wide, just below the middle. On top, draw a slightly wide oval for the head, about three quarters the body's width, overlapping it a little. Then draw the tail: a long thin oval about as long as the body is wide, rising toward the right, its left end tucked behind the bottom right of the body.
The common mistake is a tail that is too small or too round. Make it long and flat, like a paddle.
Step 2: Place the paws and the teeth
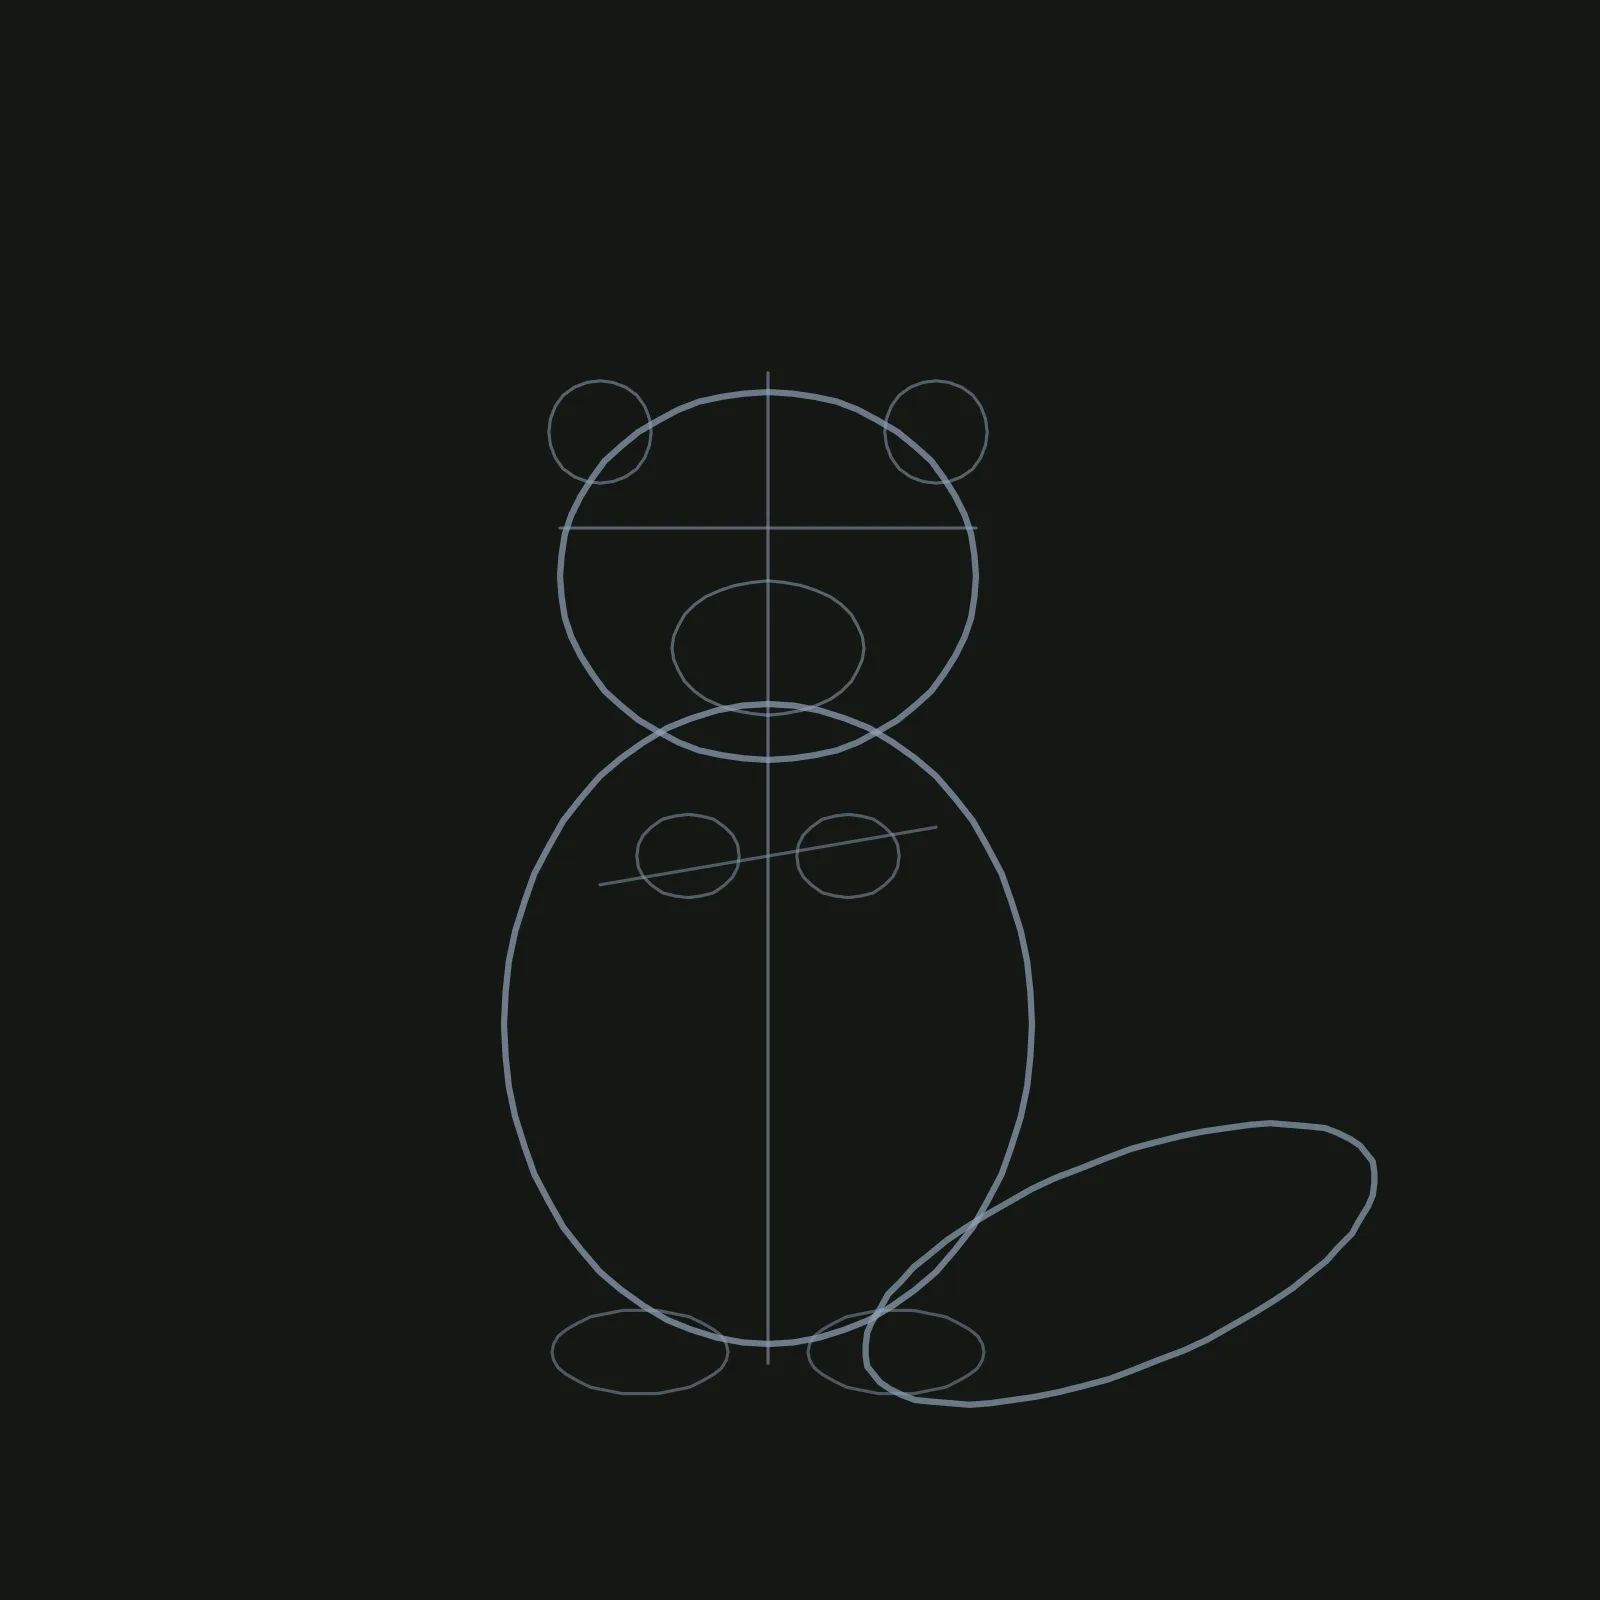
Switch to width 1. Draw a centreline through the head and body, and an eye line a little above the middle of the head. Add a small muzzle oval low on the head and two ear circles on its top corners, half on and half off. Just under the chin, draw two small paw ovals side by side with a line through them tilting gently up to the right: the stick. Finish with two flat ovals for the back feet along the bottom of the body.
Keep the stick short: if its ends poke past the body, the next step gets harder.
Step 3: Find the outline
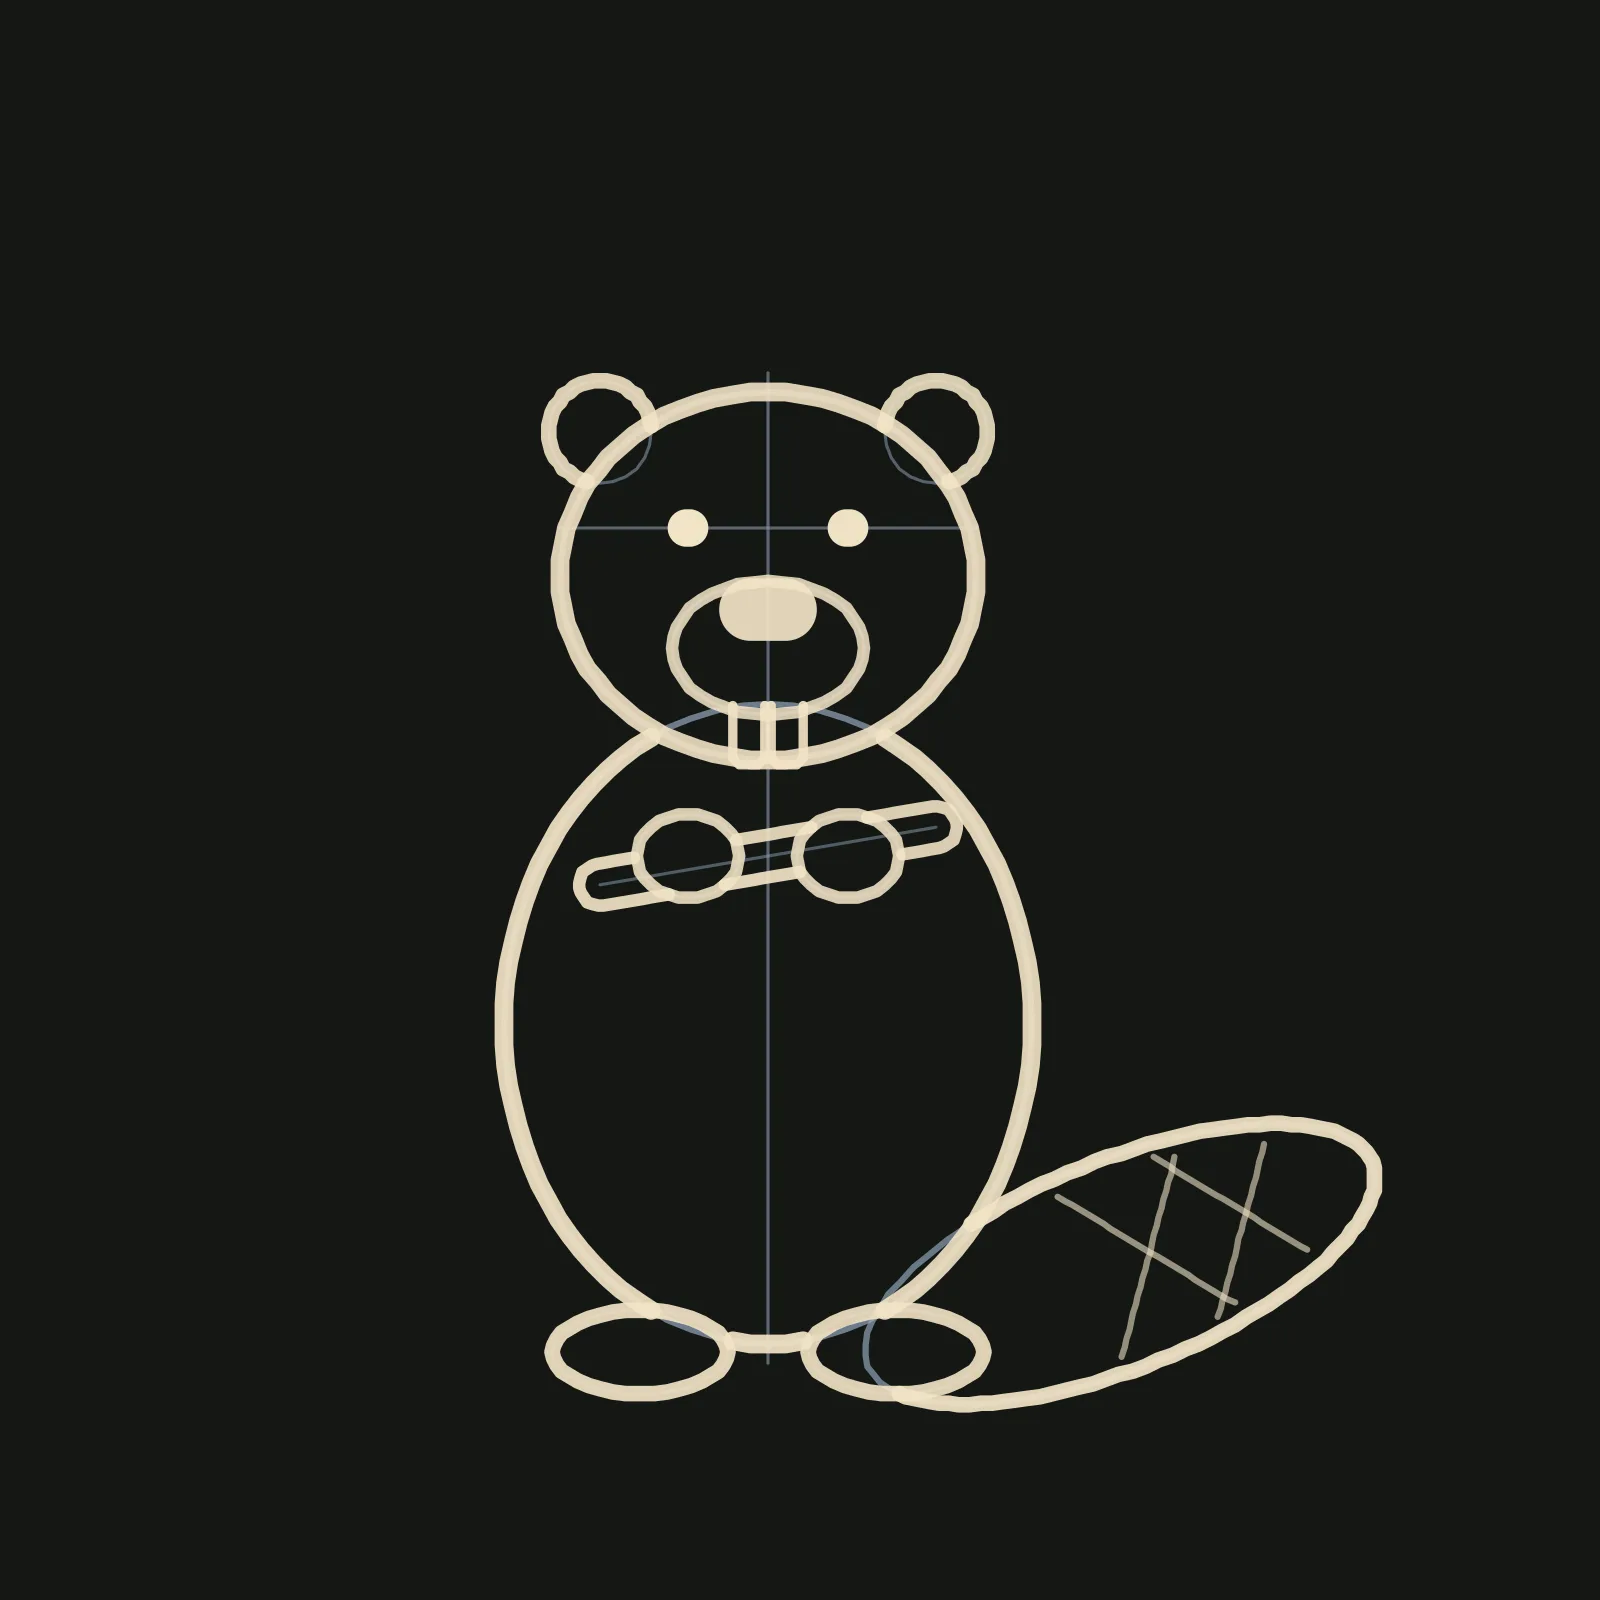
Pick a warm cream and the freehand brush at width 5. Trace the tail, stopping where the body and foot cover it, and add a crosshatch at width 2, two lines each way. Trace the body, stopping at the head and feet, then the feet. Draw the stick as a long thin capsule that stops at the paws, then the paws. Trace the ears only where they stick out past the head, then the head and muzzle. Add a wide oval nose, two rounded rectangle teeth hanging from the bottom of the muzzle, and two dot eyes.
The mistake is drawing every shape whole. Only draw the parts you would actually see.
Step 4: Fill in the brown coat
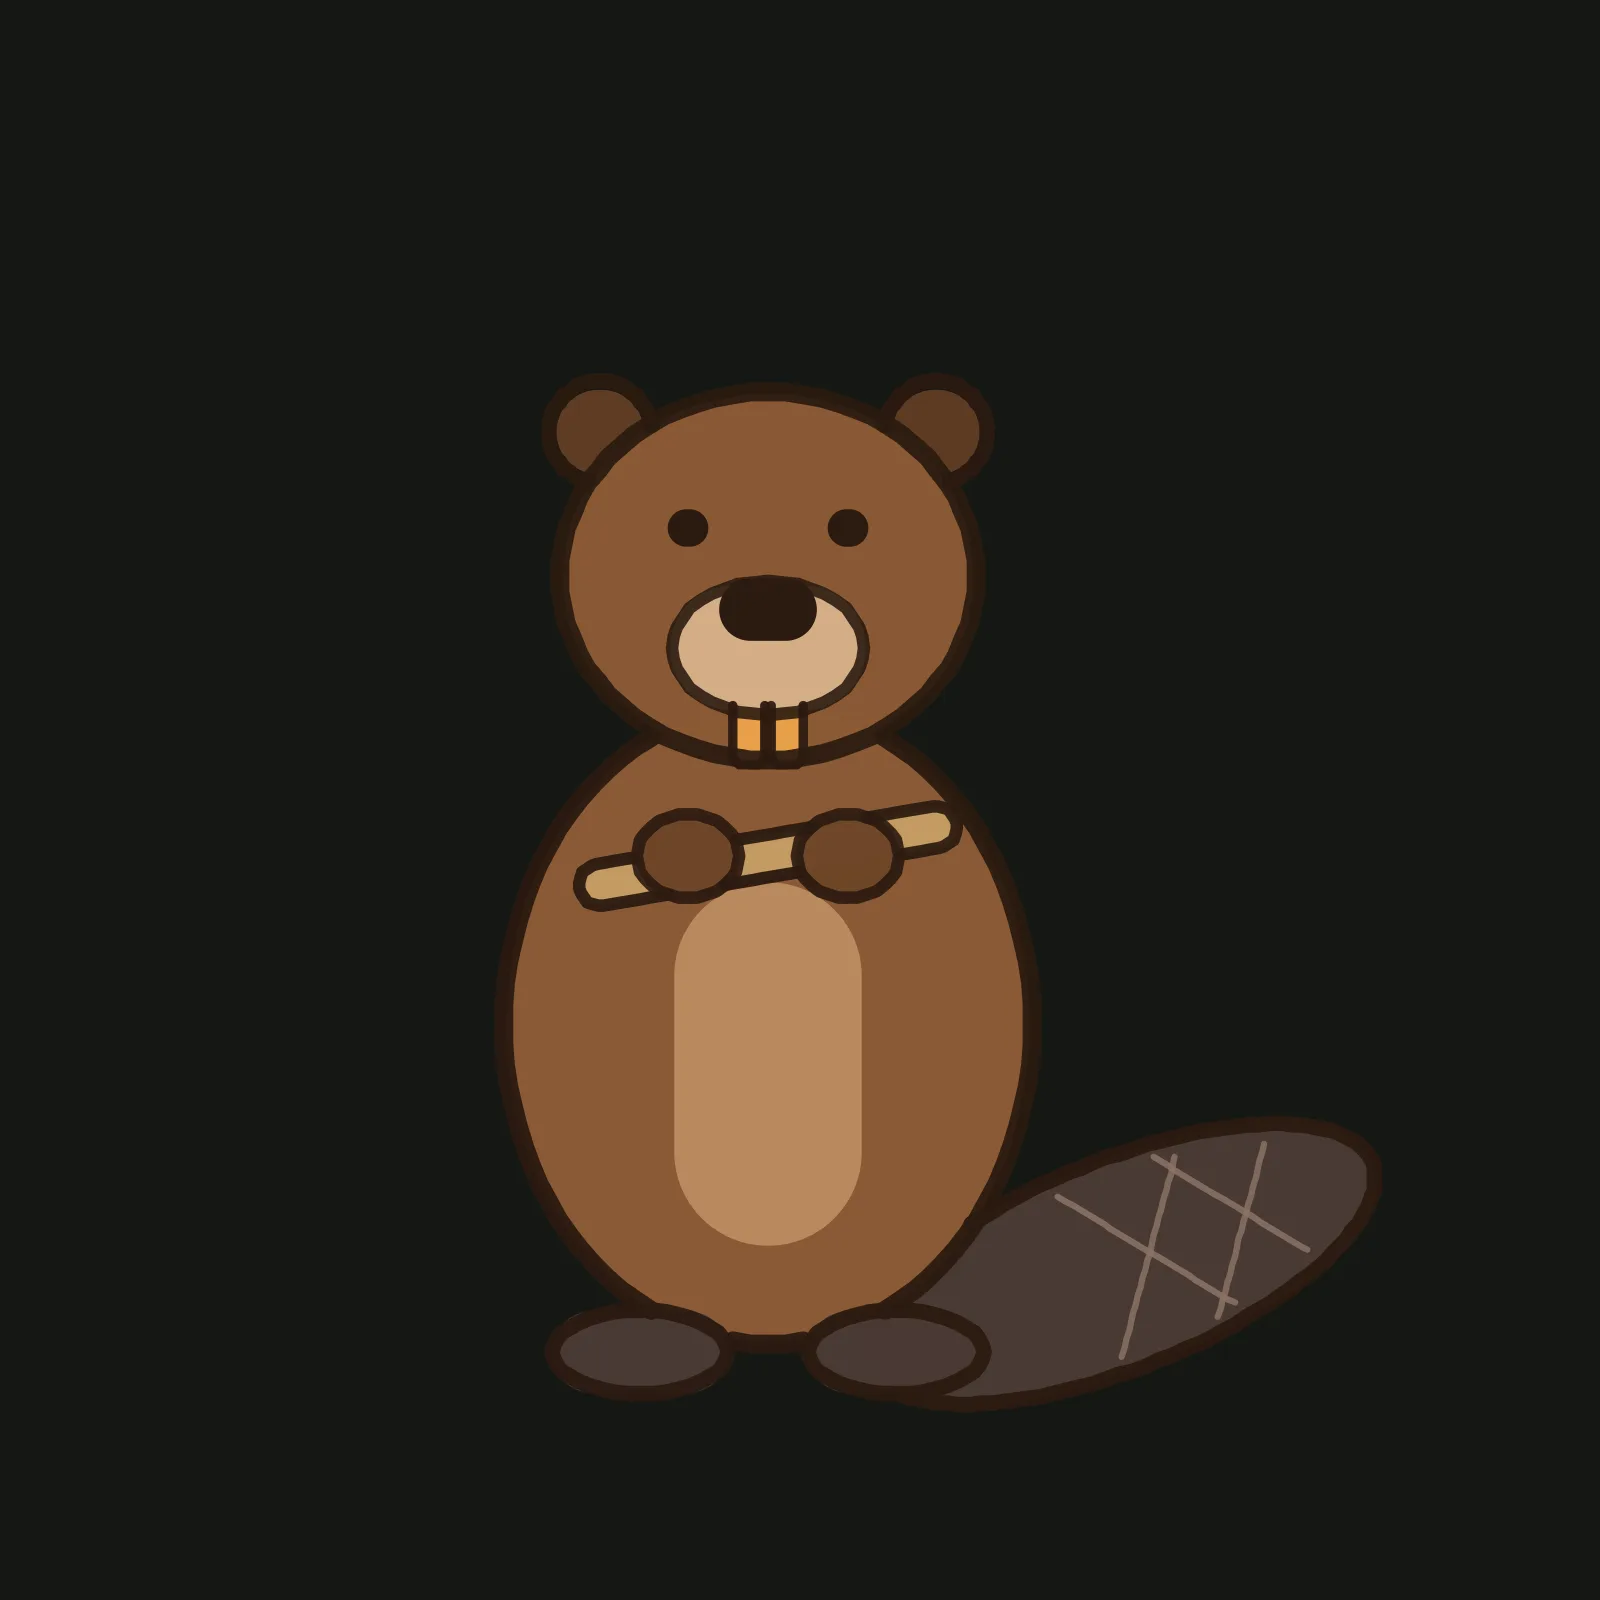
Open Layers and tap + Layer. Everything from here on goes on the new layer. Colour the tail charcoal with one width 34 stroke running just inside its edge. Fill the body brown with a width 60 stroke round the inside of its edge, then a tall tan stroke at width 60 down the middle for the belly. Dab dark ears, then fill the head with one width 60 stroke inside its edge. Add the muzzle in cream at width 40, two short orange teeth, the stick in wood at width 13, dark paws and charcoal feet. Then redraw the outline, nose and eyes in near black brown, and the crosshatch in soft grey brown.
When the new lines are down, delete the sketch: in Layers, tap delete on Drawing 1, the bottom layer, and confirm. The guides go in one tap; the eraser would nick every line a guide crosses.
Yes, the teeth really are orange: a beaver's front teeth have iron in their enamel. White teeth are the mistake here.
Step 5: Add one shadow and one highlight
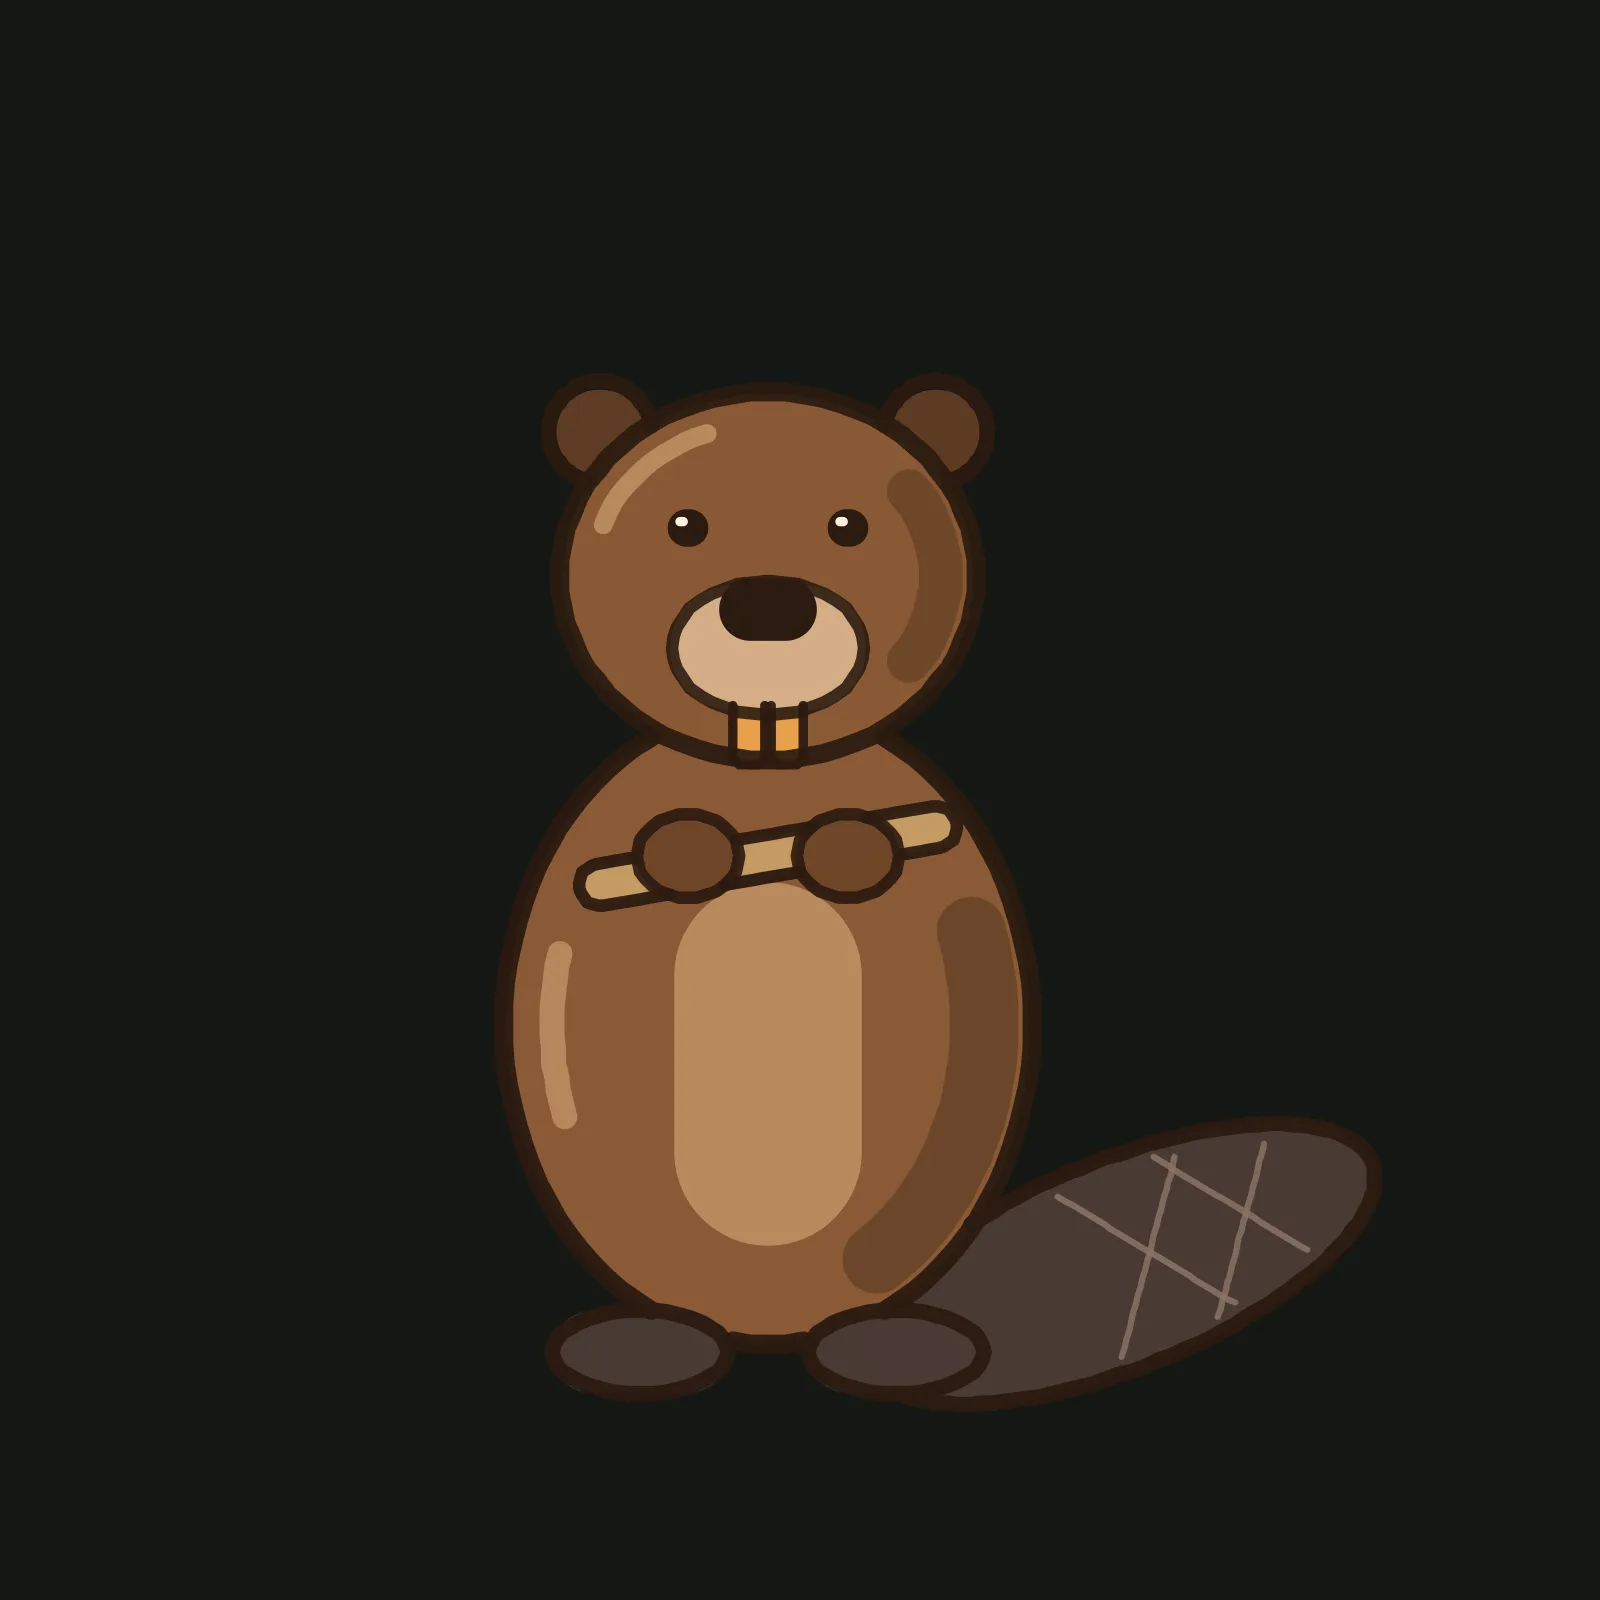
The light comes from the top left. In shadow brown at half opacity and width 22, draw a curve inside the right side of the body, from shoulder toward foot, and a shorter one at width 14 on the head. In pale tan at width 8, draw a short curve inside the left edge of the body, below the stick, and another on the upper left of the head. Put a tiny white dot in each eye.
Keep the shadow soft: at full opacity it reads as a stripe.
Step 6: Hang the Beaver Moon
Now give the light a source. In the upper left corner, draw the moon in moon cream: one small ring at width 45 fills a circle about a sixth of the canvas wide. Around it, a bigger circle at width 18 and 15% opacity makes the glow. Dab two craters and tap four tiny stars.
Keep the moon small and in the corner, clear of the ears.
Draw it yourself
Open the editor on grovetracks.com and draw a beaver of your own: give it a bigger stick, a lily pad or a little dam of twigs under the moon. For a head start, open any step's gallery page above and branch it to pick up from exactly that stage. Every step shows its lineage back to the first three ovals, and the finished beaver's Made from section walks the whole tutorial.
Trace the finished beaver back to its roots, every step linked in one view: the beaver's lineage.
For another round animal drawn the same way, How to Draw an Owl uses the same method, and How to Draw Light in Line Art has more on choosing where the light comes from.