How to Draw an Owl in Five Easy Steps
An owl is one of the friendliest first animals to draw, because it is almost all shapes you already know: an egg, two circles and a triangle. What makes it read as an owl is one idea: an owl has no neck. Its head is the top of its egg shaped body, and its face is two circles side by side, with an eye in each and the beak where they meet. Add two ear tufts and it says owl before a single feather goes down.
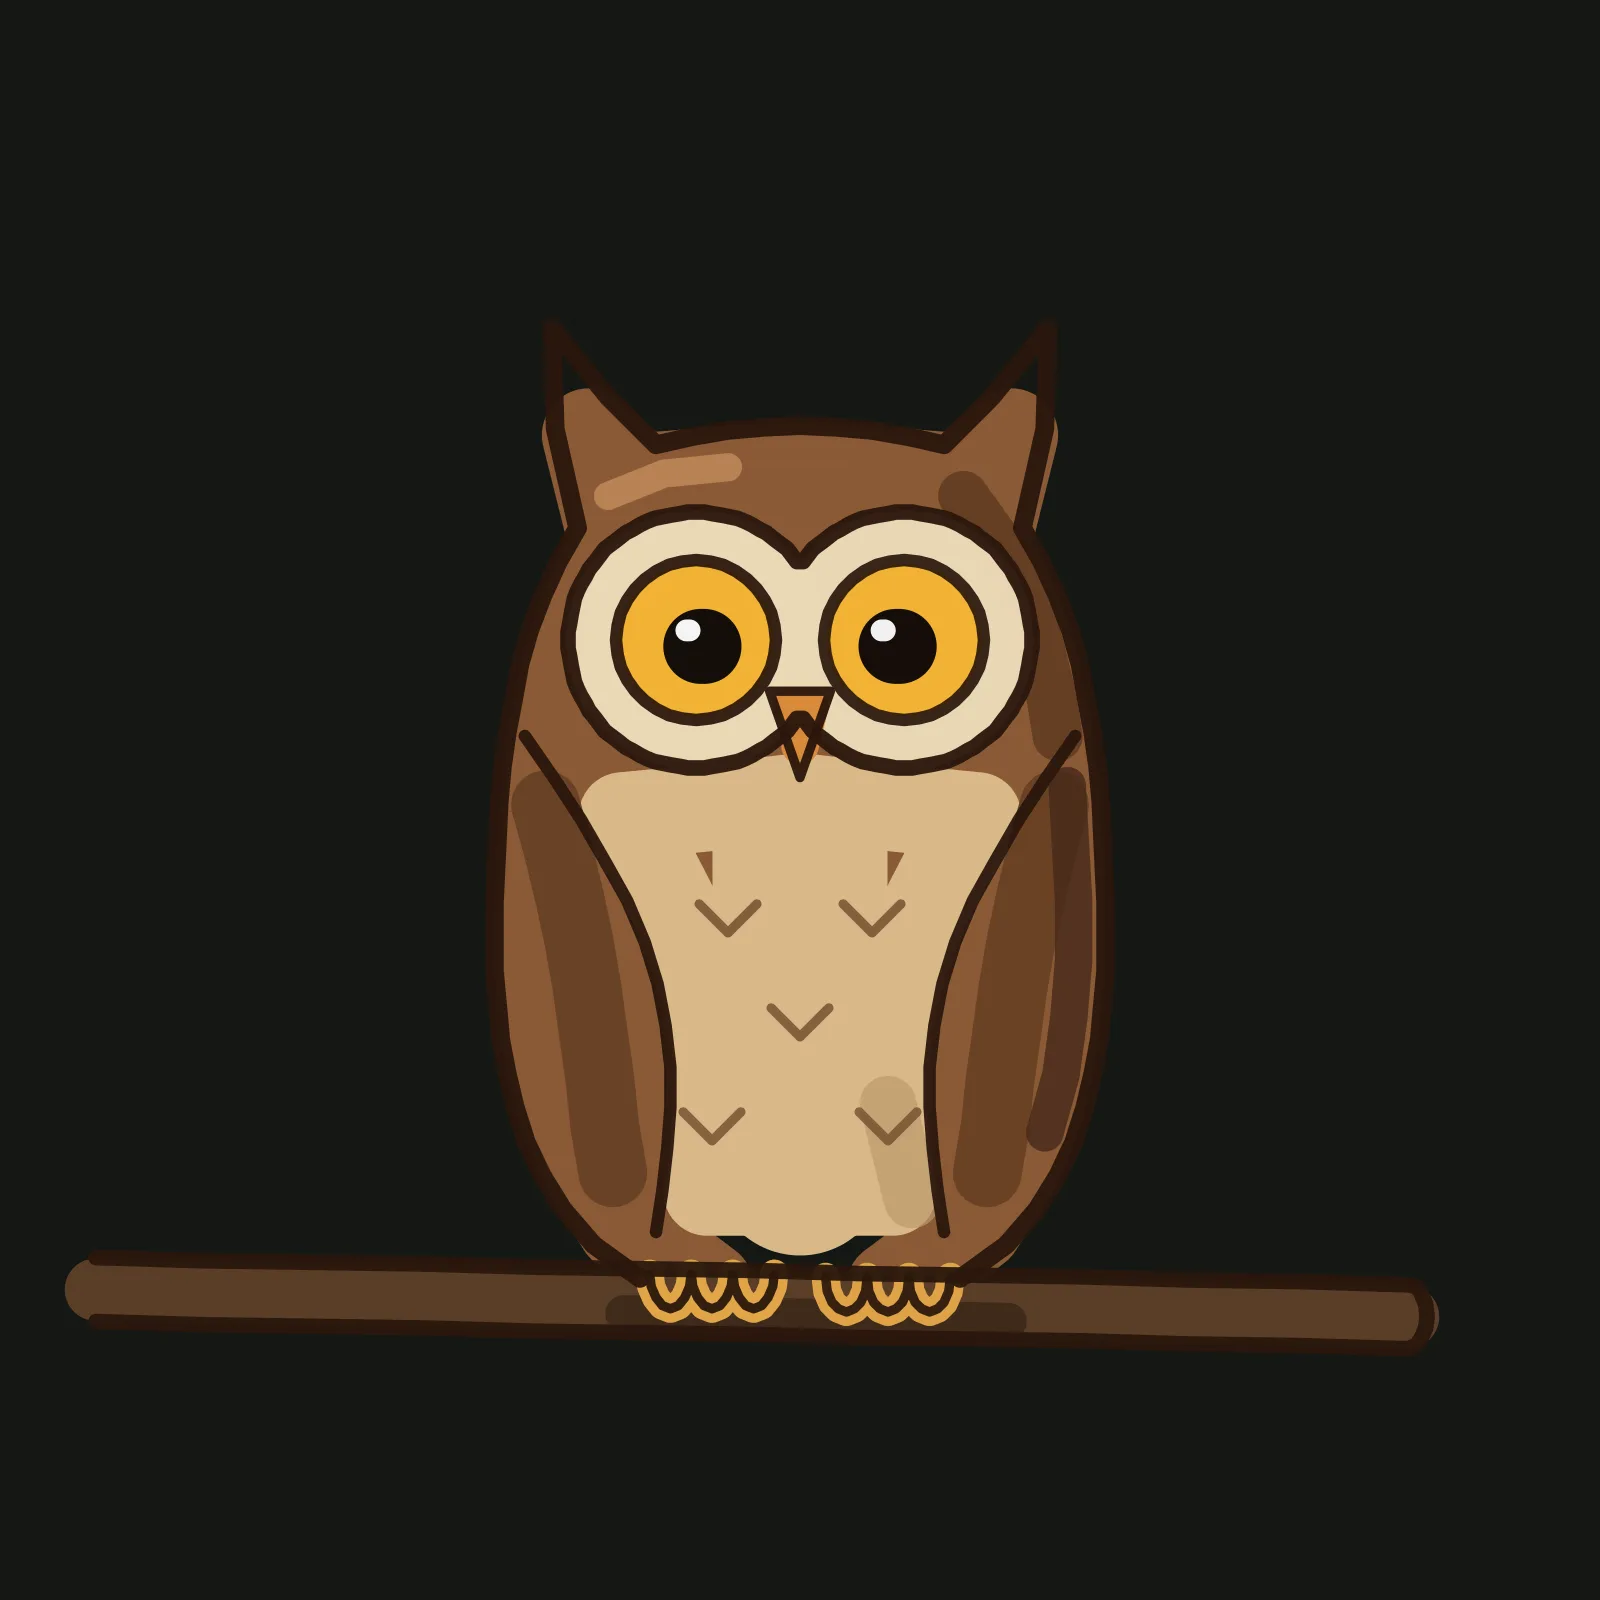
What you need
Everything happens in the Grovetracks editor on the default dark canvas: the ellipse tool for circles, the line tool for the branch and guides, the freehand brush for outline and colour, and the eraser for guides. If you like, put the colour on a layer under the line art. Colours: grey blue for pencil, warm cream and dark brown for the outlines, a mid brown and a darker brown, light tan, pale cream, gold, black, orange, and a little white.
Step 1: Draw an egg and two circles
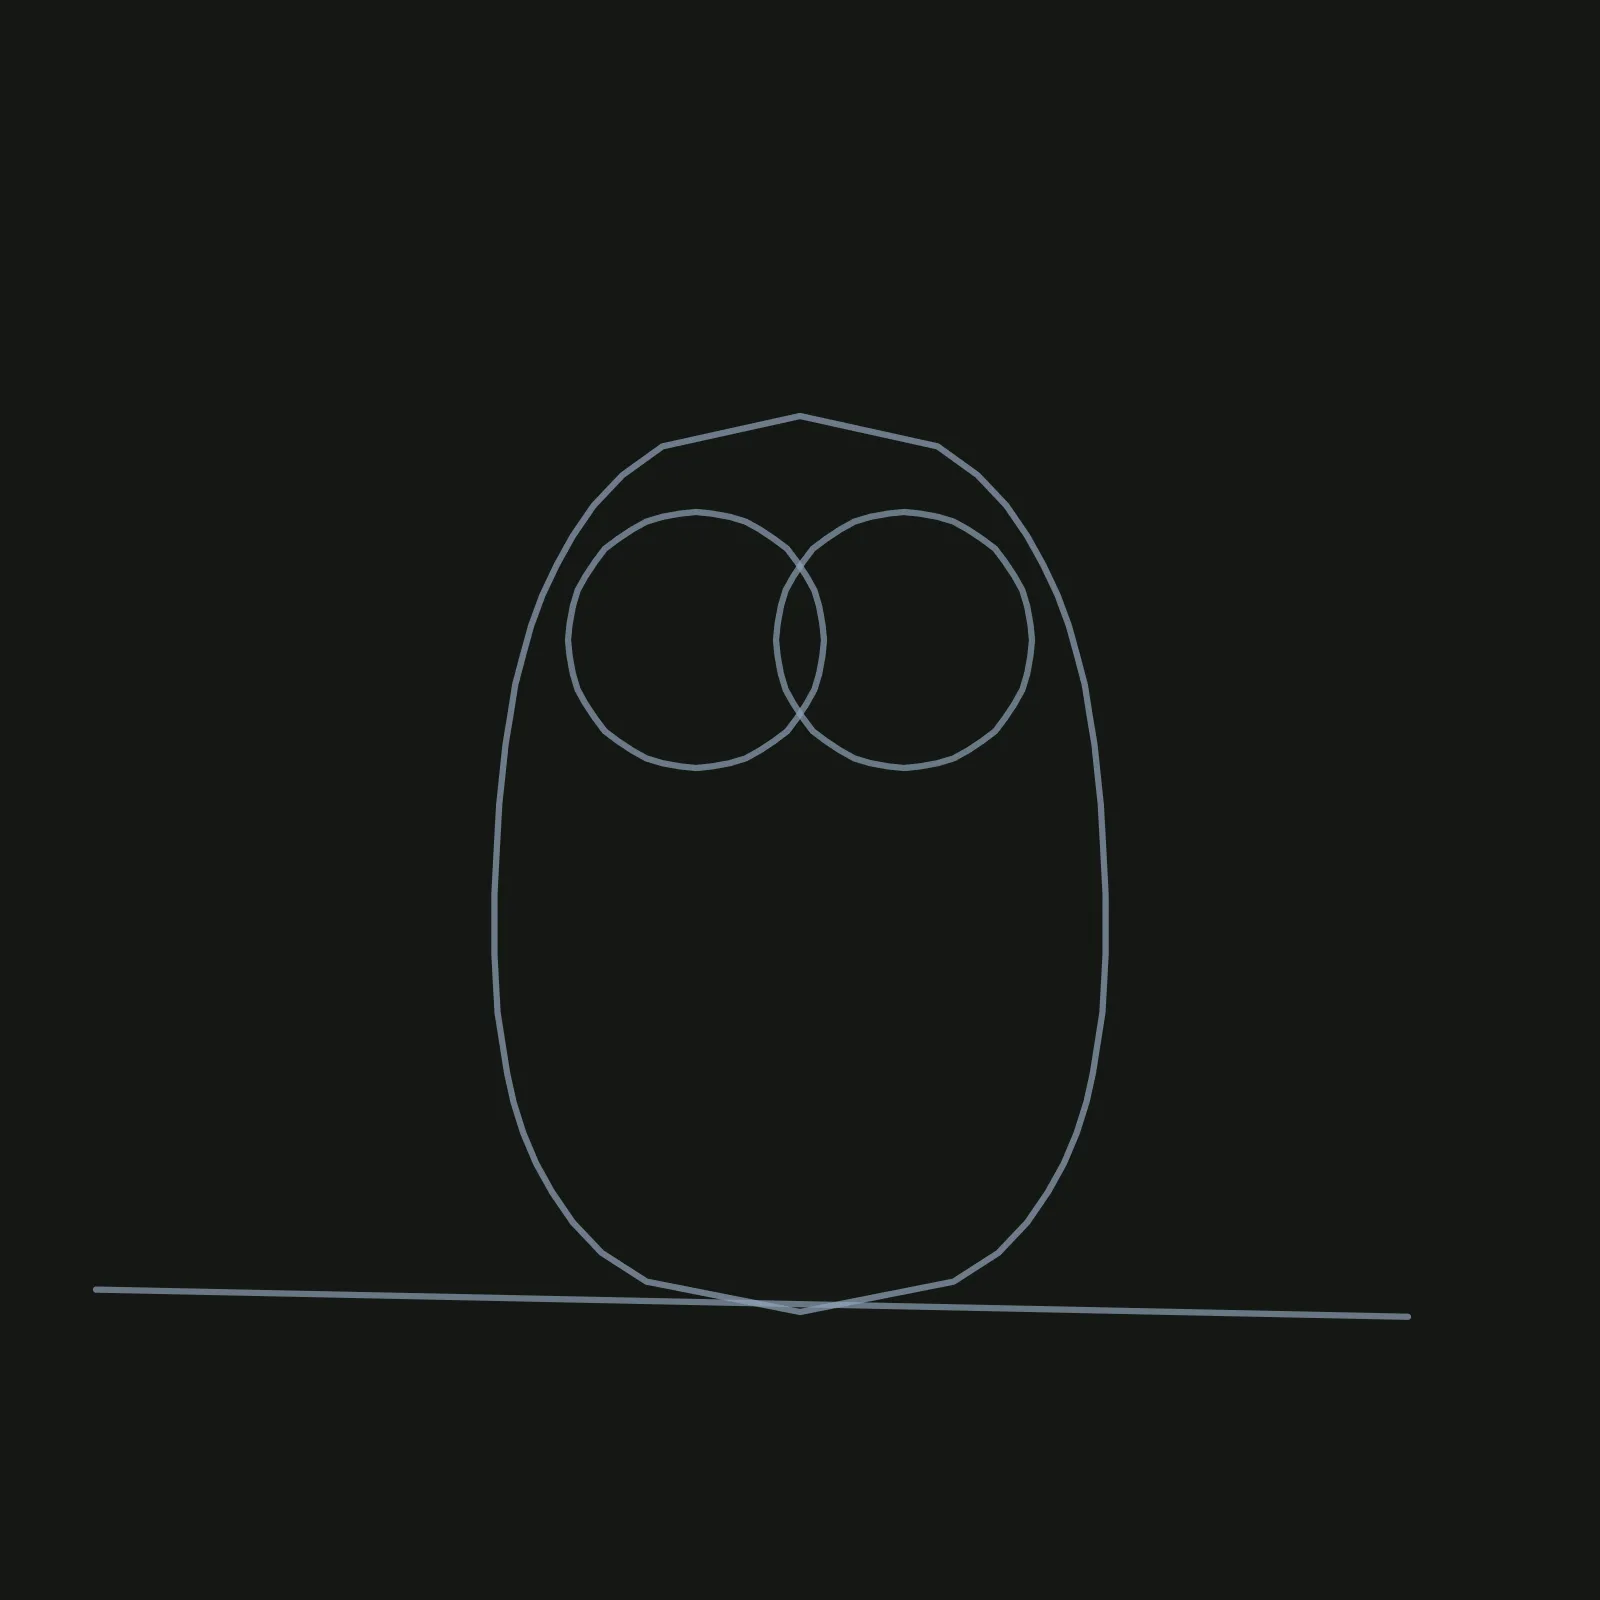
With a thin brush (width 2), draw a tall egg in the middle of the canvas, a little under two fifths of the canvas wide and just over half as tall. Keep the top broad, not pointed: that is the head. With the ellipse tool, draw two circles side by side across the upper part of the egg, overlapping a little in the middle. Last, with the line tool, draw a long line under the egg for the branch.
The common mistake is drawing a separate round head. One egg is the whole bird.
Step 2: Add the wings and ear tufts
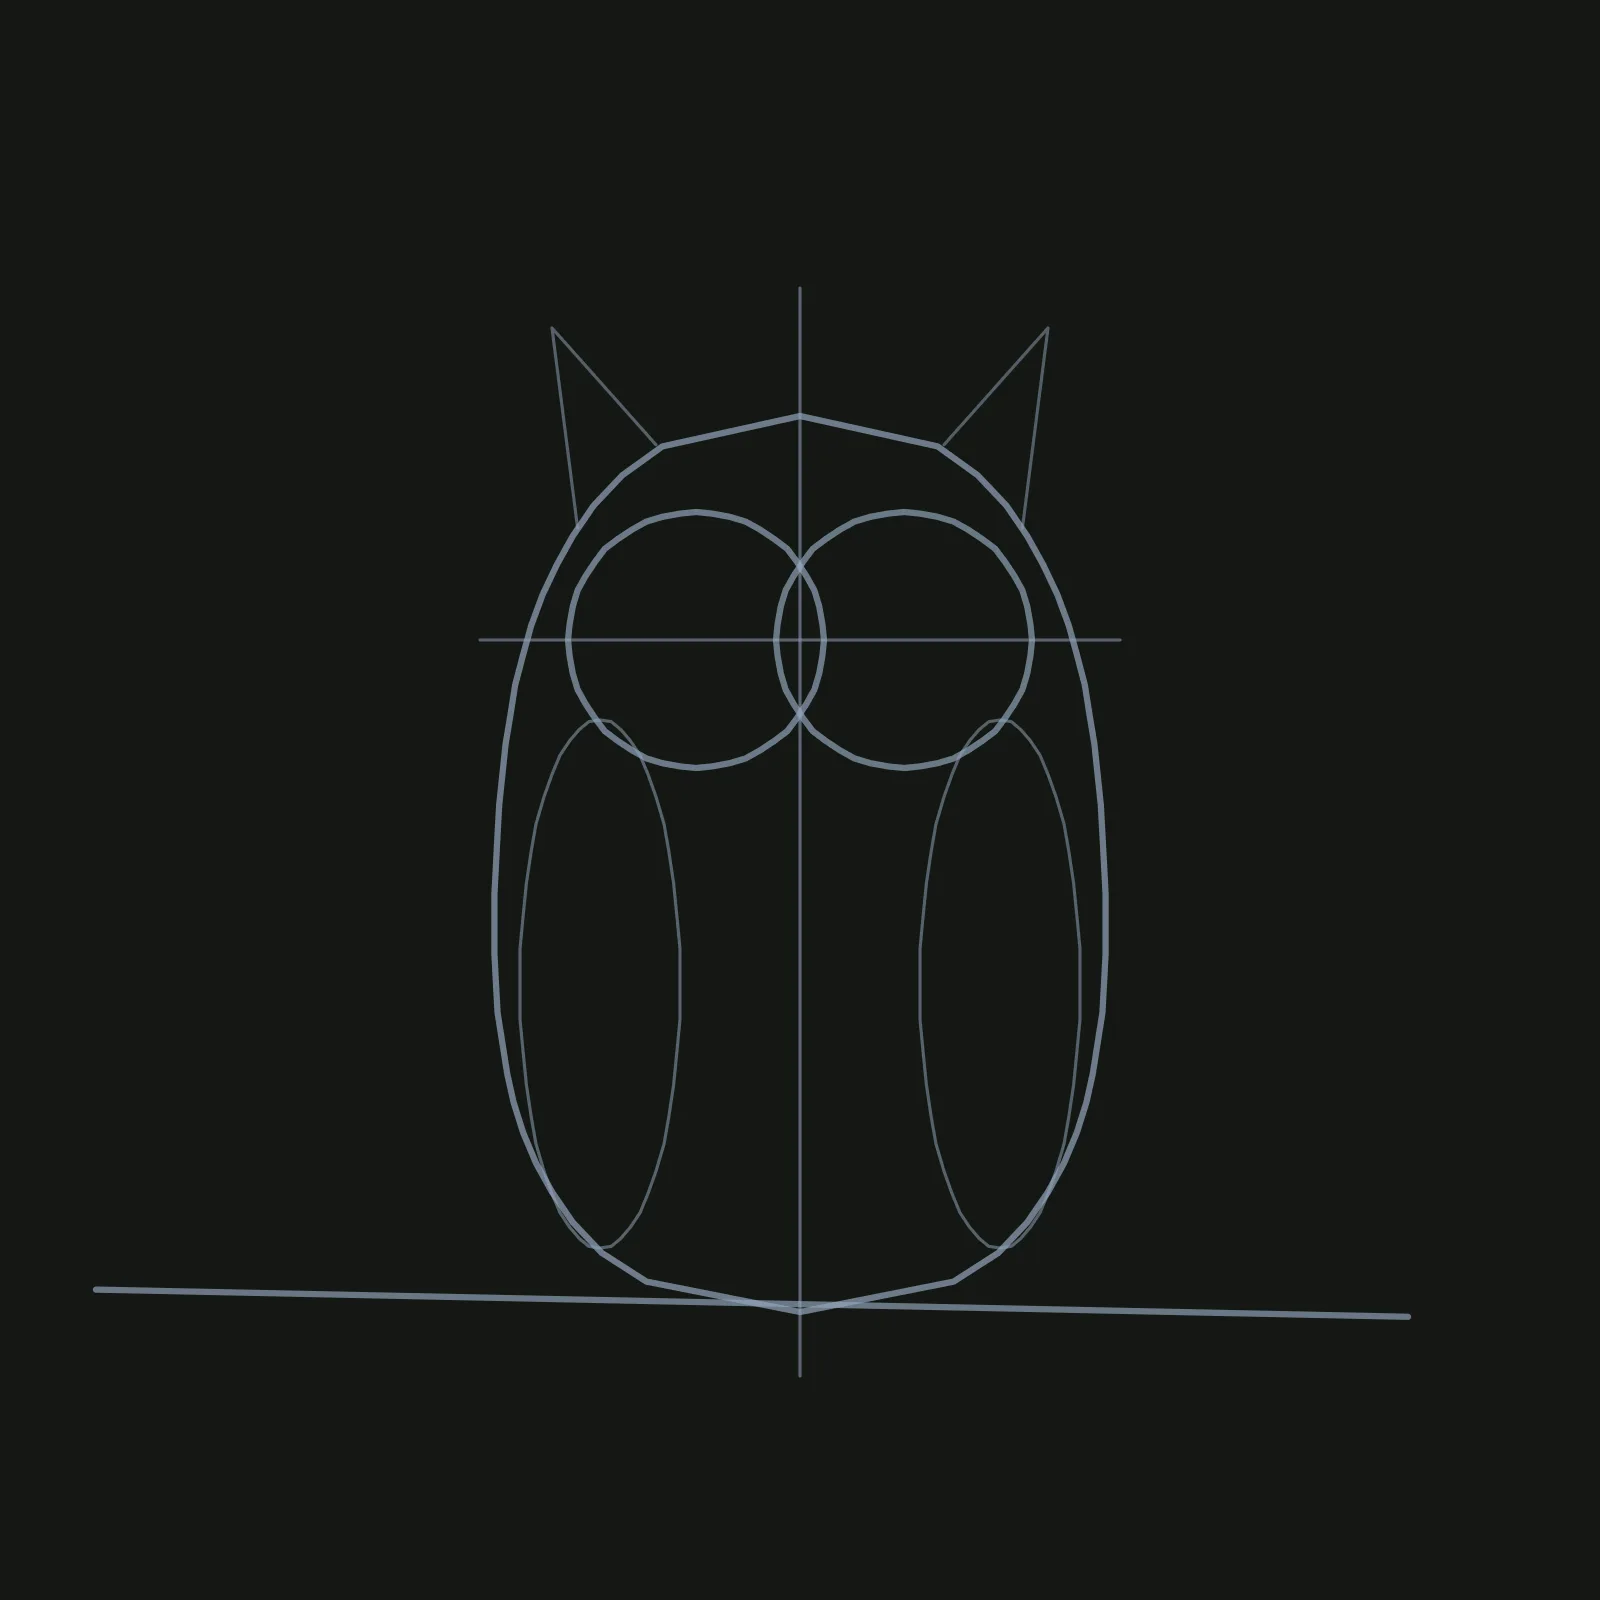
Switch to width 1. Draw a line down the middle of the egg and a level eye line through both circles. With the ellipse tool, draw a tall thin oval down each side of the body, from a little below the eye line to just above the branch: the folded wings. Then draw a tall pointed triangle on each top corner of the head for the ear tufts.
The mistake here is tufts that are too small. Make them tall, or the owl turns into a cat.
Step 3: Find the outline
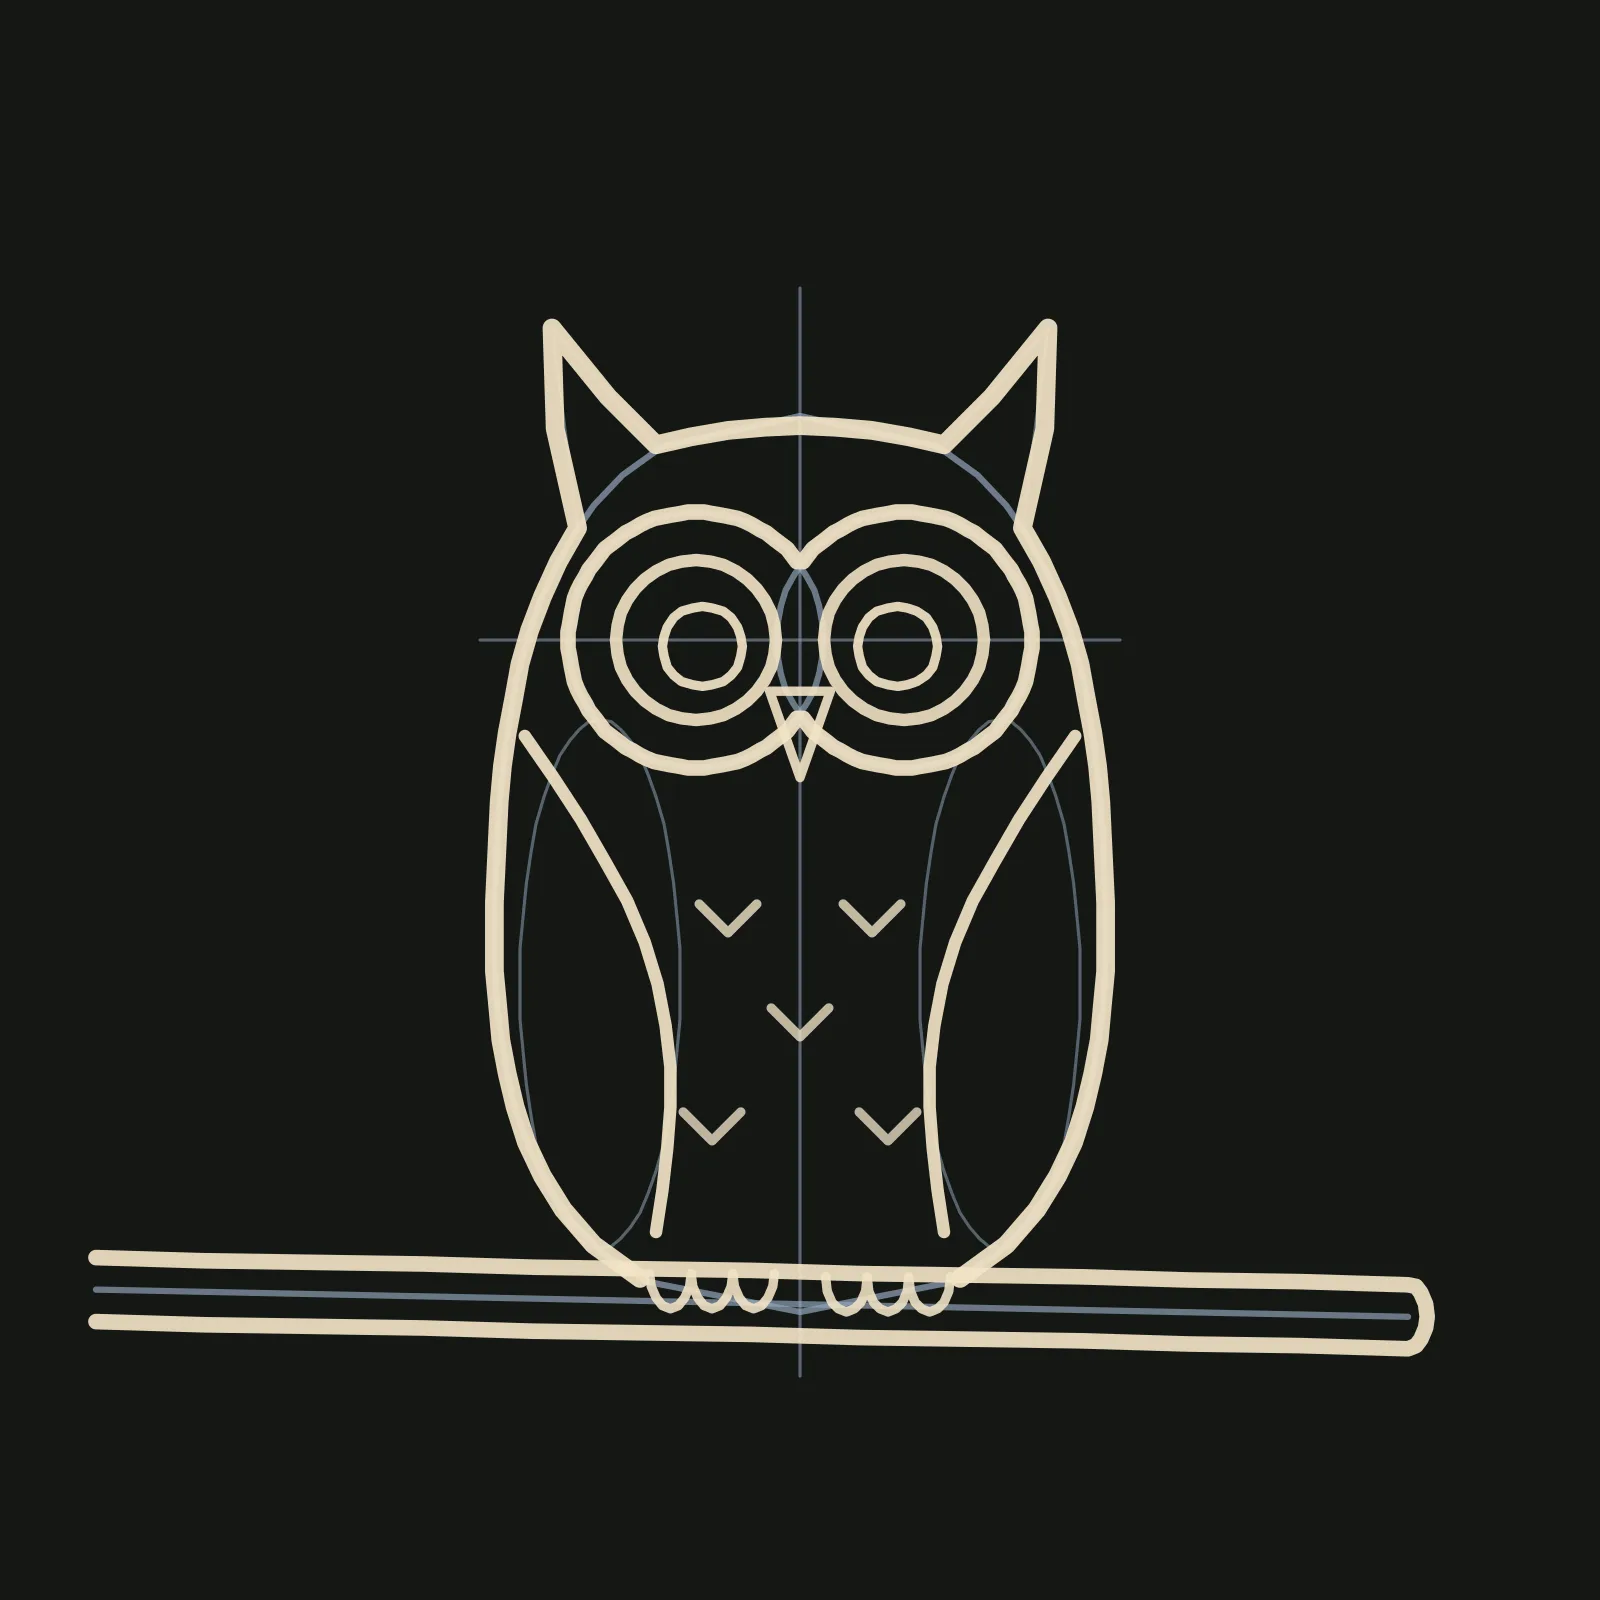
This is where it becomes an owl. With the brush in warm cream at width 6, trace the body in one long line: up one side, into a tuft, across the head, into the other tuft and down the other side, stopping both ends at the branch. At width 5, trace around the outside of the two circles for the face disc, with a notch top and bottom where they meet. With the ellipse tool at width 4, draw an eye in each circle and a smaller pupil in each eye. Add a small upside down triangle for the beak in the bottom notch.
At width 4, draw each wing as one curve from the shoulder, bowing in toward the belly and ending in a point near the branch. Add five small v shapes on the belly at width 3, the branch as a long rod with a rounded end, and three little toe loops on each foot, curled over the branch.
The one mistake to watch: the wing lines curve in, toward the belly, not out. Curve them out and the owl looks like it is wearing a coat.
Step 4: Add flat colour
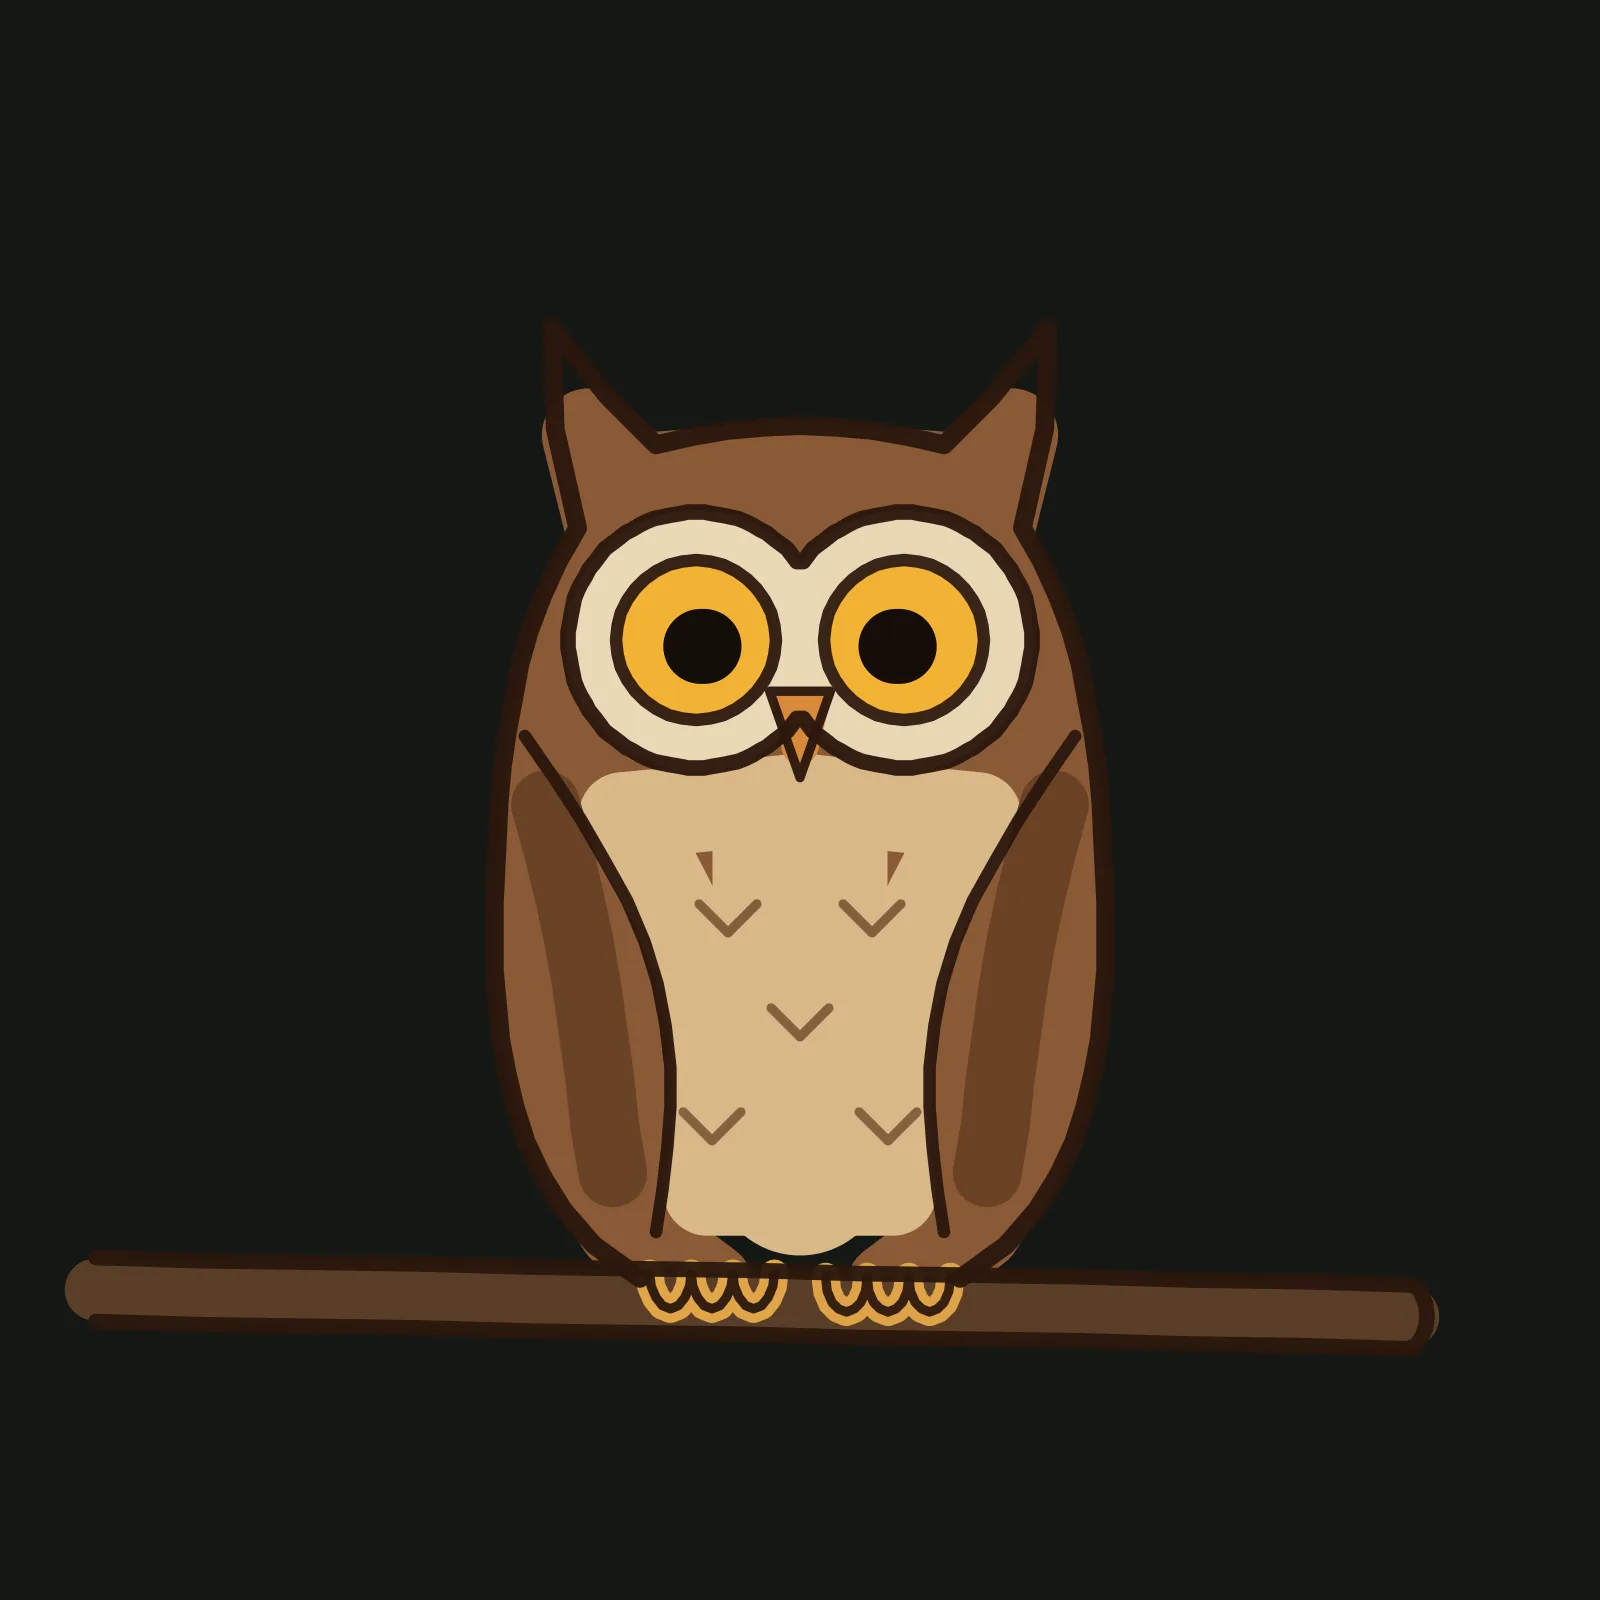
Erase the pencil guides. There is no fill bucket, so colour goes on like a marker. Run mid brown at width 30 around the inside of the body and across the head, then scribble across the middle at width 50. Fill each wing with one darker brown stroke at about width 22. For the belly, run light tan at width 28 inside the wing lines, then one wide stroke down the middle. Draw a fat pale cream ring inside each face circle at width 40 or so.
For each eye, tap one gold dot with the brush width set to the eye's size, then a black dot for the pupil. Colour the beak and toes orange and the branch brown at width 20. Finally, redraw the outline in dark brown on top, with the belly marks in a softer brown.
The mistake here is scribbling the belly in wide rows: they spill past the curved wing lines. Follow the wing lines with the ring and let one stroke down the middle do the rest.
Step 5: Add one shadow and one highlight
Pretend the light is coming from the upper left. With a darker brown at width 16, draw one stroke down the right side of the head, just inside the outline. Add a deeper brown stroke at width 12 along the outer edge of the right wing, and a soft tan stroke at the lower right of the belly. Draw one short light brown curve across the upper left of the head, one dark stroke on the branch under the owl, and last, a tiny white dot in the upper left of each pupil.
Do not skip the catchlights. Those two white dots are the smallest strokes in the drawing, and they make the owl look back at you.
Draw it yourself
Now it is your turn. Open the editor on grovetracks.com and grow an owl of your own: a snowy white one, a tiny owlet, or two on one branch. For a head start, open any step's gallery page above and branch it to pick up from exactly that stage. Every step shows its lineage back to the first egg, and the finished owl's Made from section walks the whole tutorial.
If you enjoyed this one, the same ring and scribble colouring works on How to Draw a Mushroom, and How to Draw Animals That Read explains why a few big shapes say more than a lot of detail.