How to Draw a Ghost in Five Easy Steps
A friendly ghost is the easiest Halloween drawing there is, and a perfect first character, because it is just a circle and a sheet. What makes it read as a ghost is one idea: a round dome that flows straight down into a skirt with a scalloped hem. Add two tall dark eyes and one arm raised in a wave, and it says hello.

What you need
Everything happens in the Grovetracks editor on the default dark canvas: the ellipse tool for the head and the eyes, the line tool for guides, the freehand brush for the outline and colour, and the eraser. If you like, put the colour on a layer under the line art. Colours: grey blue pencil, warm cream, soft lavender, near white, very dark violet, dusty pink, pale lavender blue and white.
Step 1: Draw a circle and a sheet

With the ellipse tool and a thin brush (width 2), draw a circle for the head a little above the middle of the canvas, about a third of the canvas wide. Then with the line tool, drop a line from each side of the circle down to about three quarters of the way down the canvas, leaning each one slightly outward, and join their bottoms with a flat line.
The common mistake is a sheet that tapers in. A ghost gets a little wider as it goes down, like fabric settling.
Step 2: Add the face line and the wavy hem
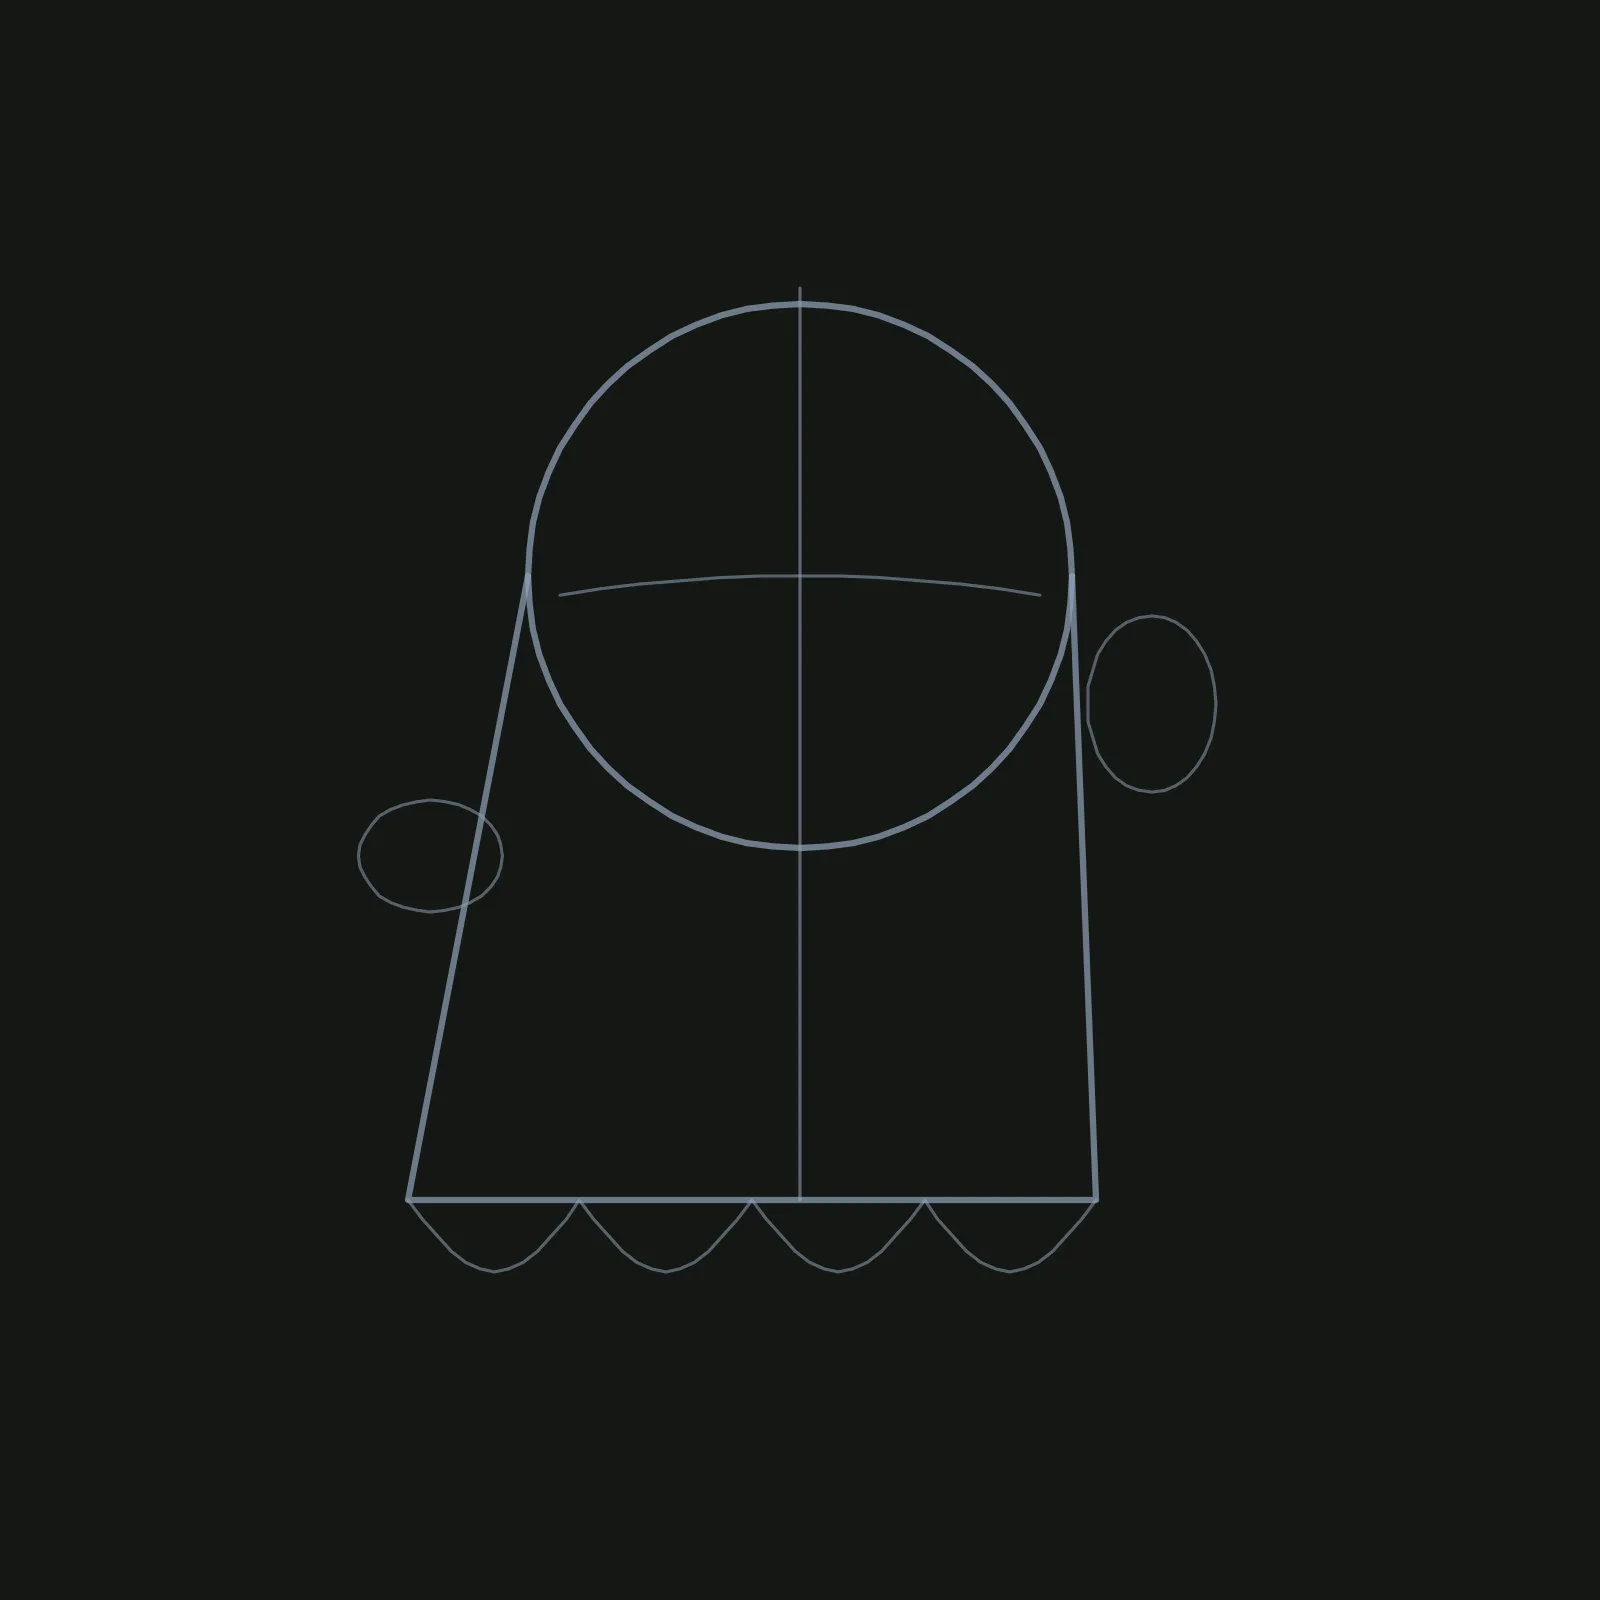
Switch to width 1. Draw a line straight down the middle, and a gently curved line across the head about halfway down it, for the eyes. Under the flat bottom line, draw four round bumps hanging down, all the same size, side by side. Then mark the arms with two small ovals: one out from the left side a little below the head, and a taller one high on the right, where a hand would be waving.
The mistake here is an uneven hem. Four equal scallops look like fabric; random wiggles look like a puddle.
Step 3: Find the outline
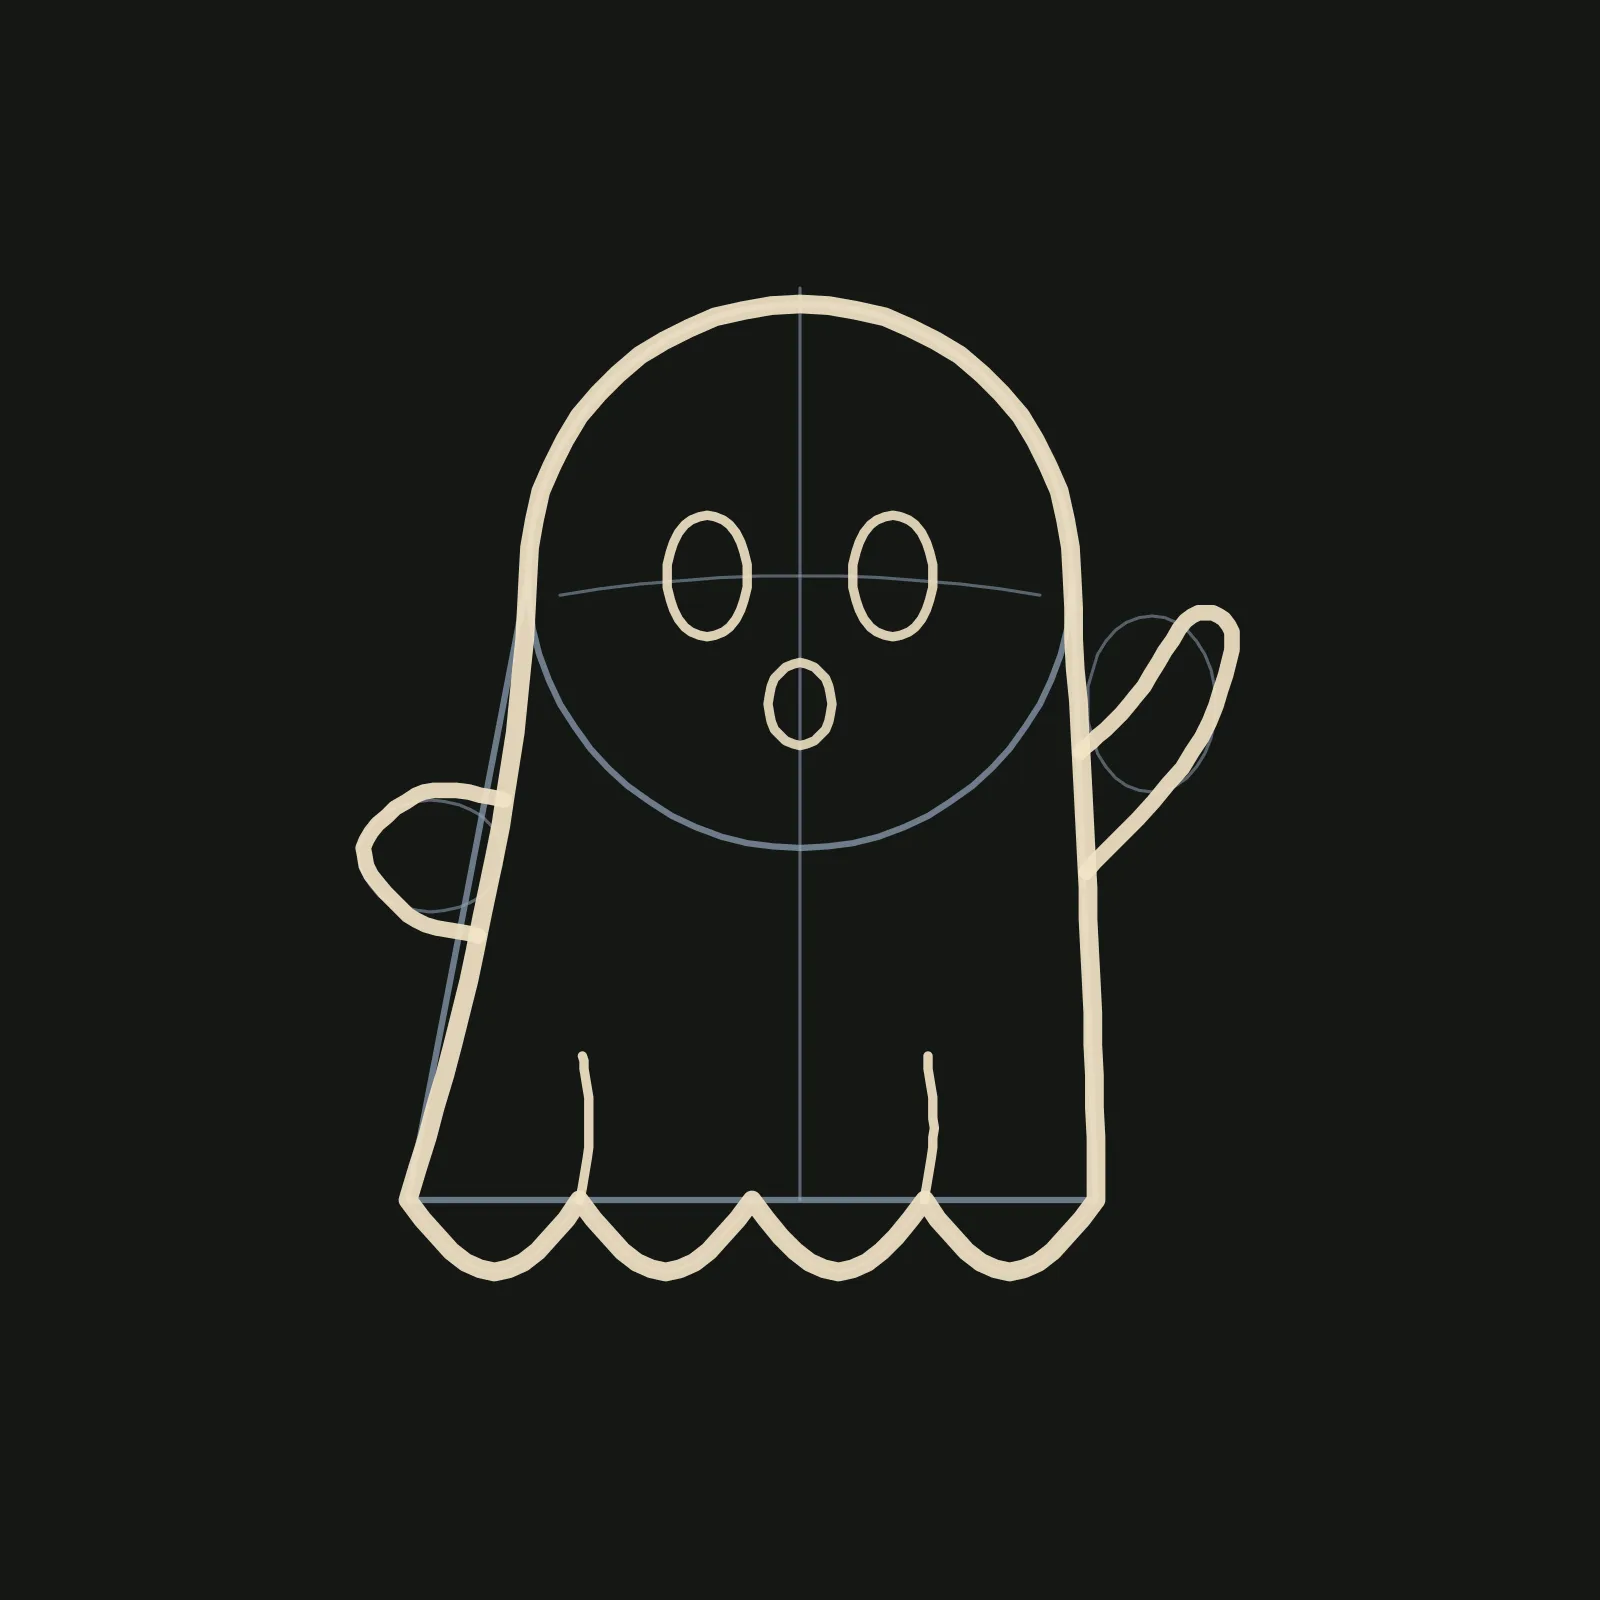
With the brush in warm cream at width 6, trace the whole ghost in one line: up the left side, over the top of the circle, down the right side, and back along the scallops to where you started. Let the bottom swing a touch to the left, as if the ghost is drifting. At width 5, draw the arms as two rounded bumps, one resting on the left and one reaching up on the right. At width 3, add a short curved fold rising from two of the points between the scallops, two tall ovals on the eye line, and a small round mouth under them.
The one mistake to watch: eyes too far apart. Keep them close to the centreline and a little taller than they are wide.
Step 4: Fill in the white sheet

Erase the pencil guides. There is no fill bucket, so the sheet goes on like a marker. In near white, fill the head with a ring at width 60 and one big dot in the middle. For the body, run one stroke at width 54 back and forth across it, row under row, then a loop at width 32 just inside the sides and a strip at width 30 along the scallops. Fill each arm with one short stroke. Put a short very dark violet stroke at width 24 in each eye, a dot in the mouth, and a pink dot on each cheek. Then redraw every line in soft lavender.
The mistake here is keeping the cream outline. Cream on white disappears; lavender keeps the ghost's edge.
Step 5: Add one shadow and one highlight
Pick the light: here it comes from the top left. In pale lavender blue at width 16 and about 70% opacity, draw one stroke just inside the right edge, from the top of the head down to just above the hem. In white at width 8, draw a short curve on the top left of the head, and add a tiny white dot at the top left of each eye. Finally, on the bottom layer, draw a flat dark oval a little below the hem, leaving a gap, so the ghost floats.
Do not let the shadow touch the hem. A gap between ghost and shadow is what makes it hover.
Draw it yourself
Open the editor on grovetracks.com and draw a ghost of your own: a tiny one peeking out from behind it, a ghost holding a pumpkin, or one with a sleepy face. For a head start, open any step's gallery page above and branch it to pick up from exactly that stage. Every step shows its lineage back to the first circle, and the finished ghost's Made from section walks the whole tutorial.
For a ghost with company, How to Draw a Pumpkin and How to Draw a Black Cat use the same five step method, and How to Shade White and Black has more on giving a white subject shape without turning it grey.