How to Draw a Pumpkin in Five Easy Steps
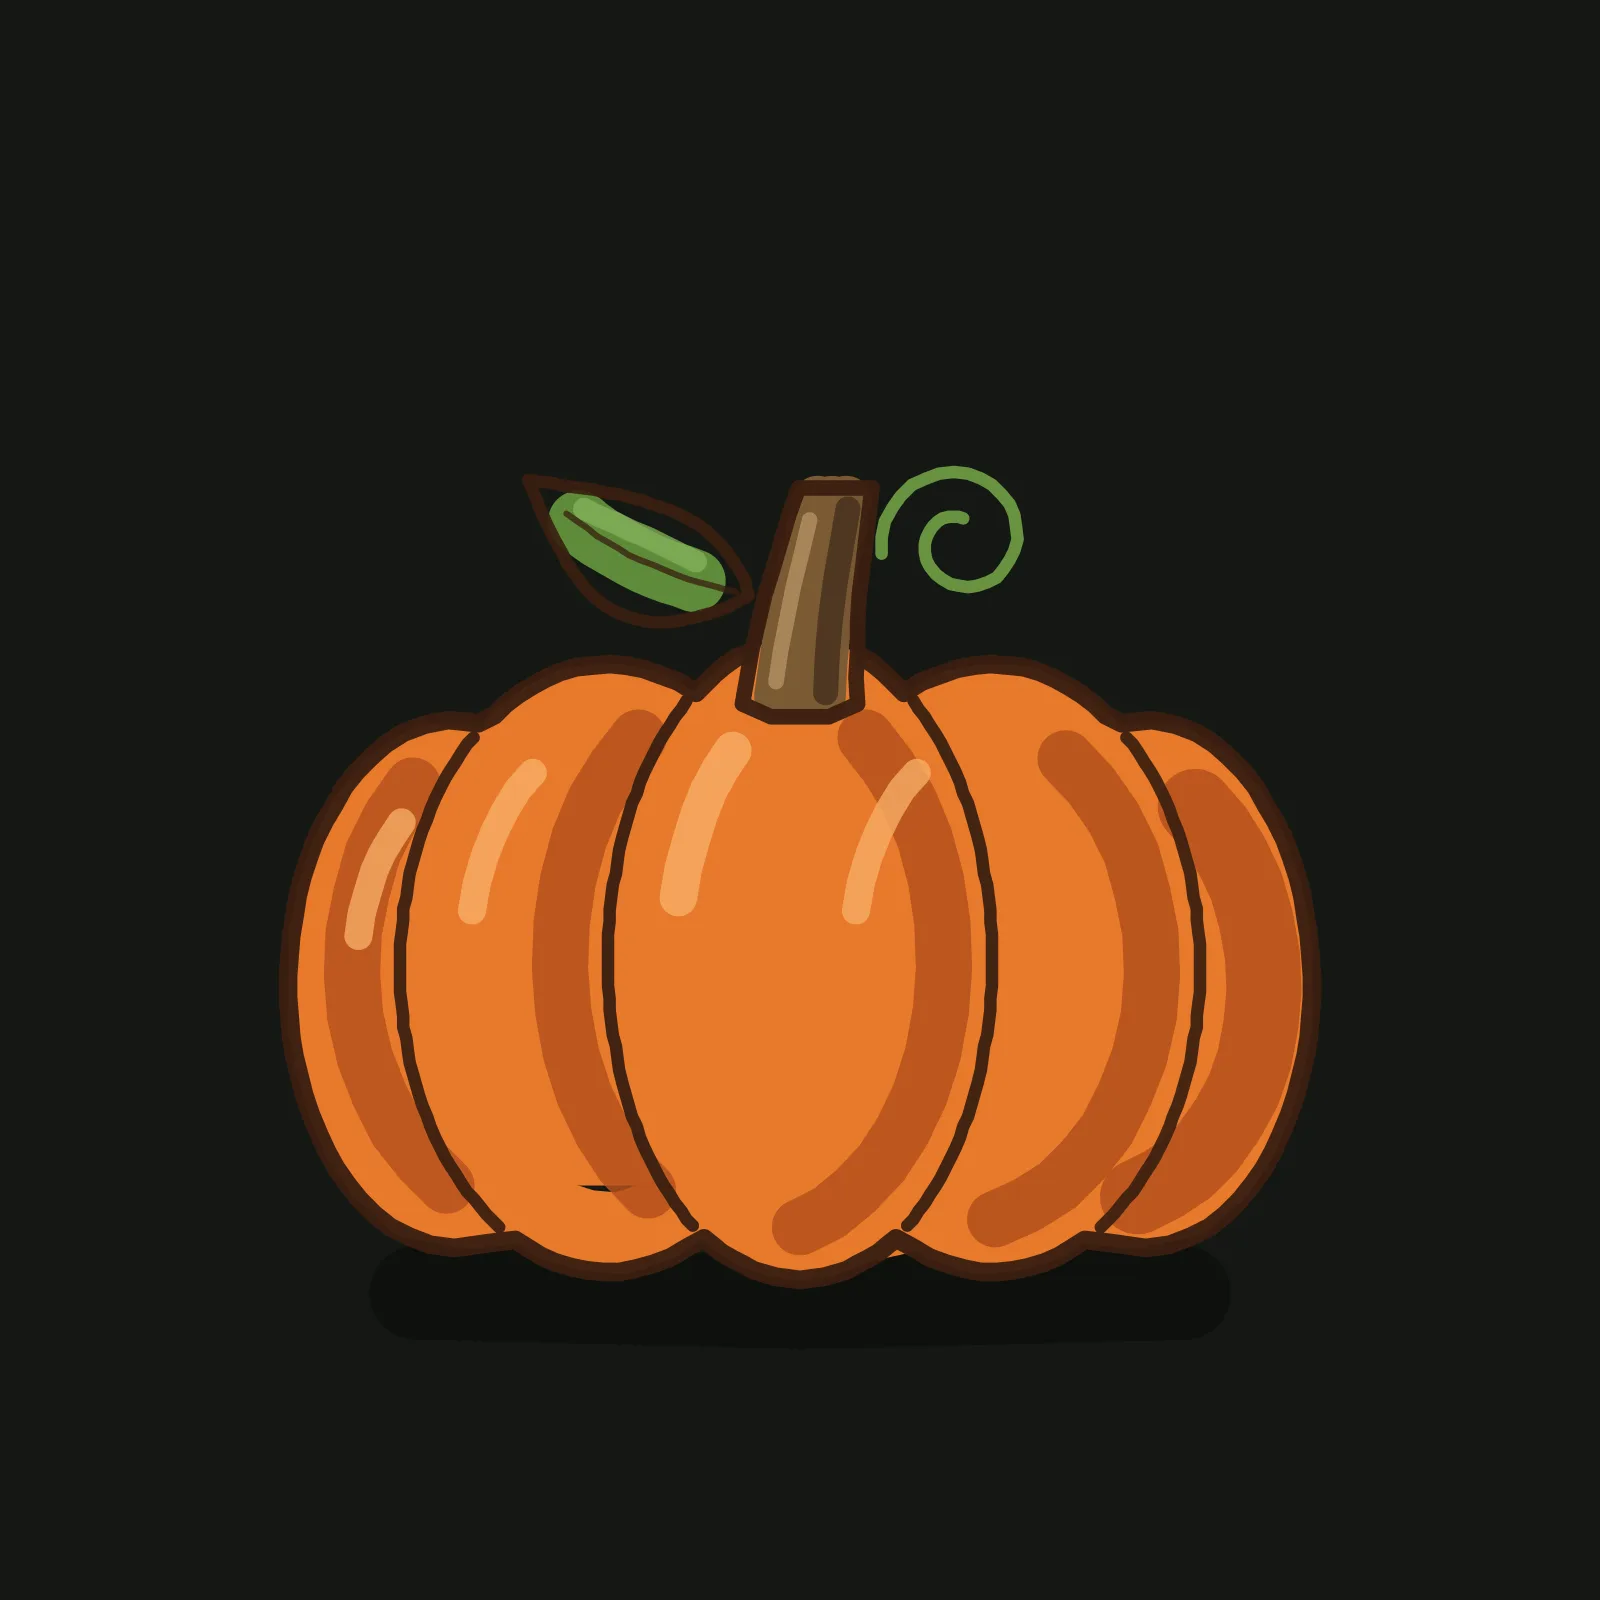
A pumpkin is one of the friendliest things you can draw on the first day of autumn. It sits still, it forgives a wobbly line, and it is built from nothing harder than ovals. The one idea that makes it read is this: a pumpkin is not a ball. It is five lobes squeezed side by side, the middle one in front and the others tucked behind it, with a little notch at the top where the stem goes in. Get the lobes and the notch right and your outline says pumpkin before you add a drop of orange.
What you need
Everything here happens in the Grovetracks editor on the default dark canvas. You will use the ellipse tool and the freehand brush for the pencil shapes, the brush for the outline and the colour, and the eraser to clear your guides once the outline is down. If you like to keep things tidy, put the colour on a layer under the line art. Colours: a light grey blue for pencil, a warm cream for the first outline, a dark brown for the final outline, two oranges (one bright, one deeper), a pale orange, a mid brown for the stem, and a leafy green.
Step 1: Draw an oval and a box
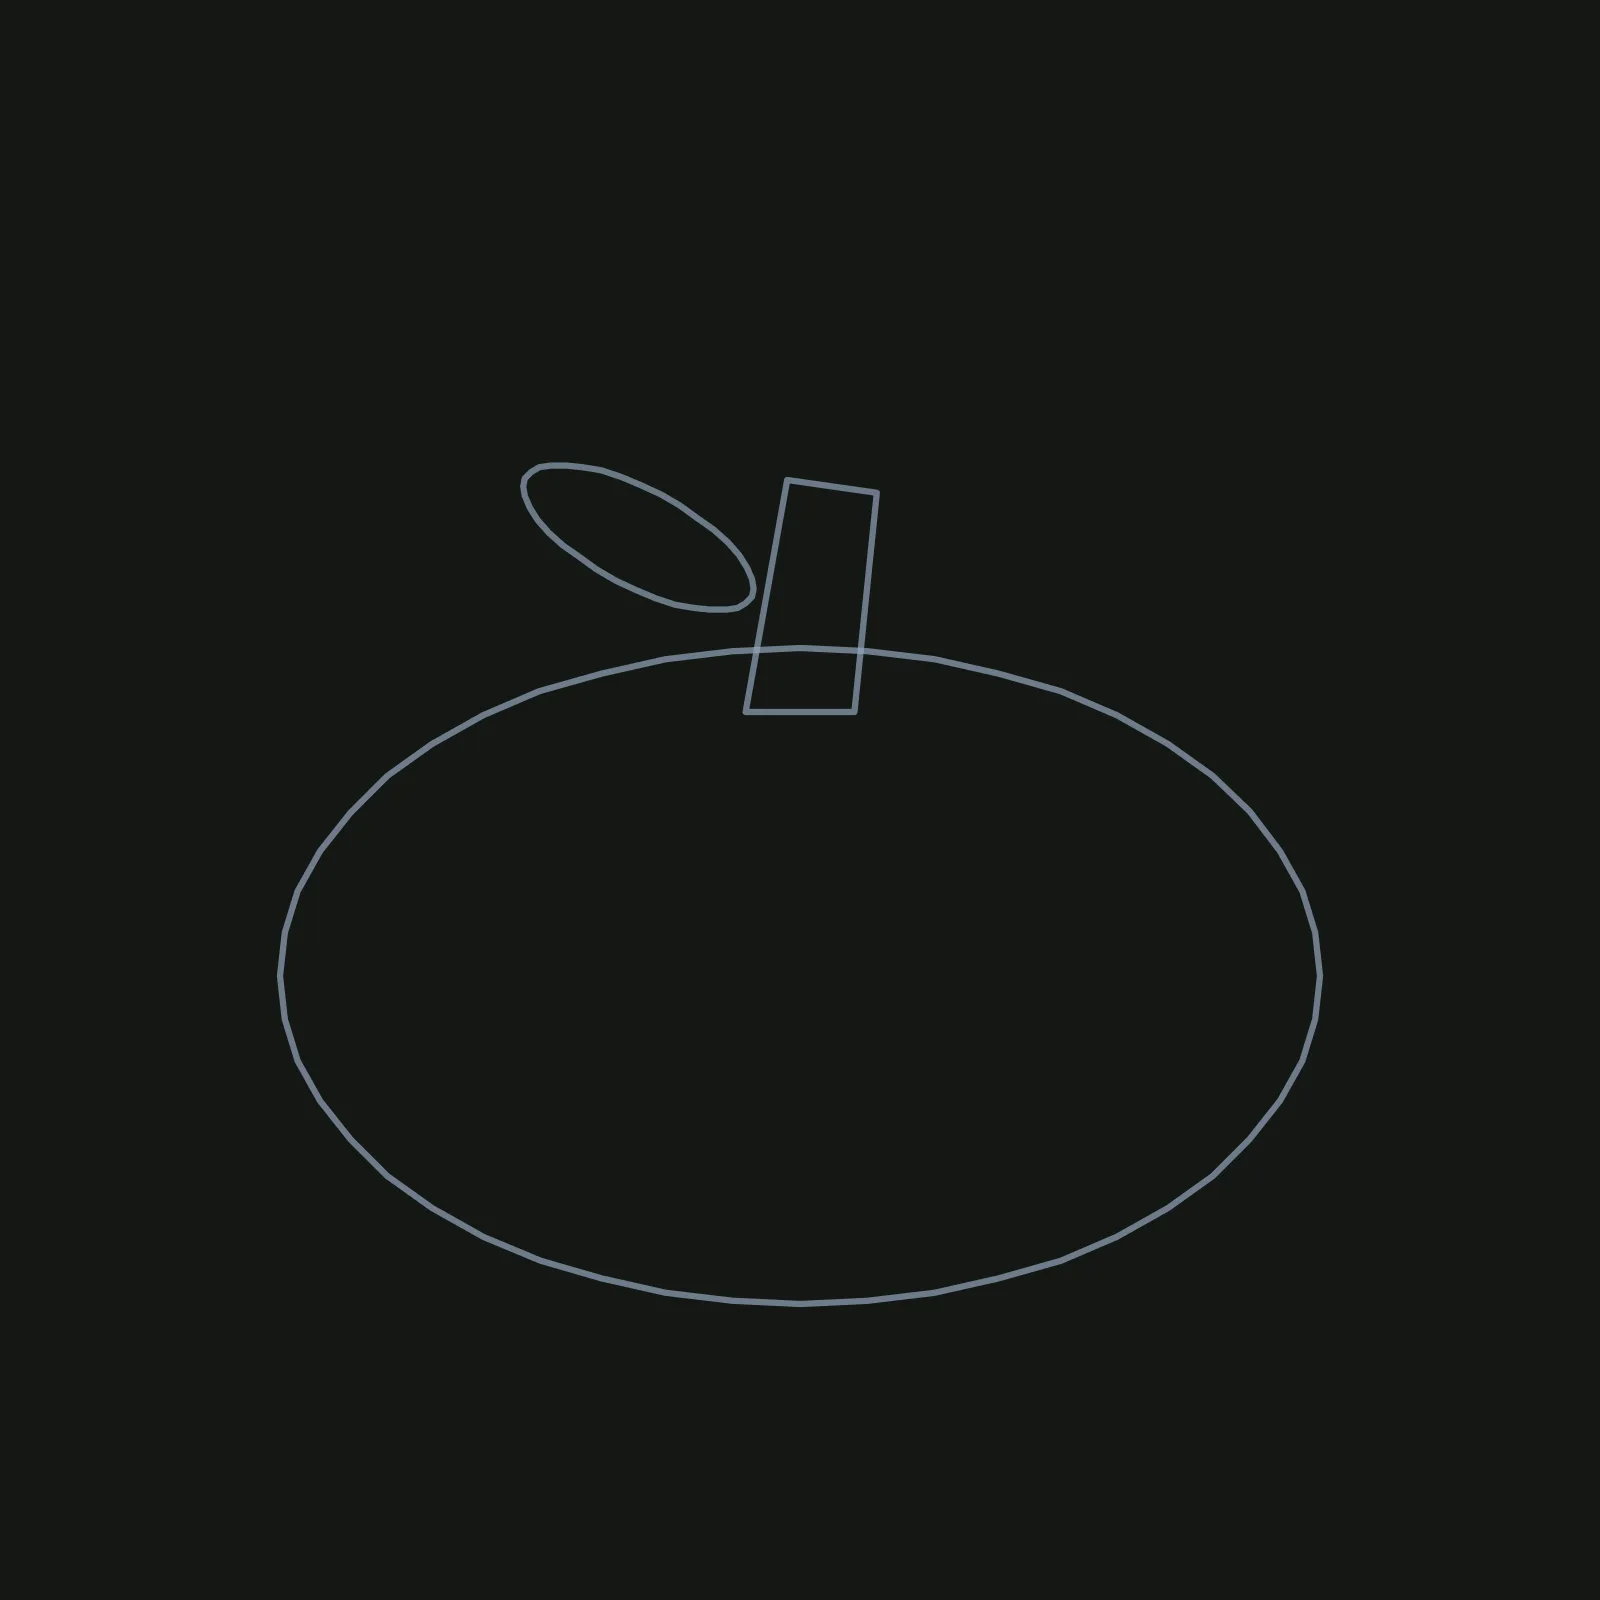
With the ellipse tool and a thin brush (width 2), draw one wide oval across the middle of the canvas, about two thirds of the canvas wide and a bit more than half as tall as it is wide. On top of it, in the middle, draw a small box for the stem, leaning slightly to the right. Then add a narrow tilted oval to the left of the stem for a leaf.
The common mistake here is making the body too round. Real pumpkins are squat, so keep the oval flat.
Step 2: Split it into five lobes
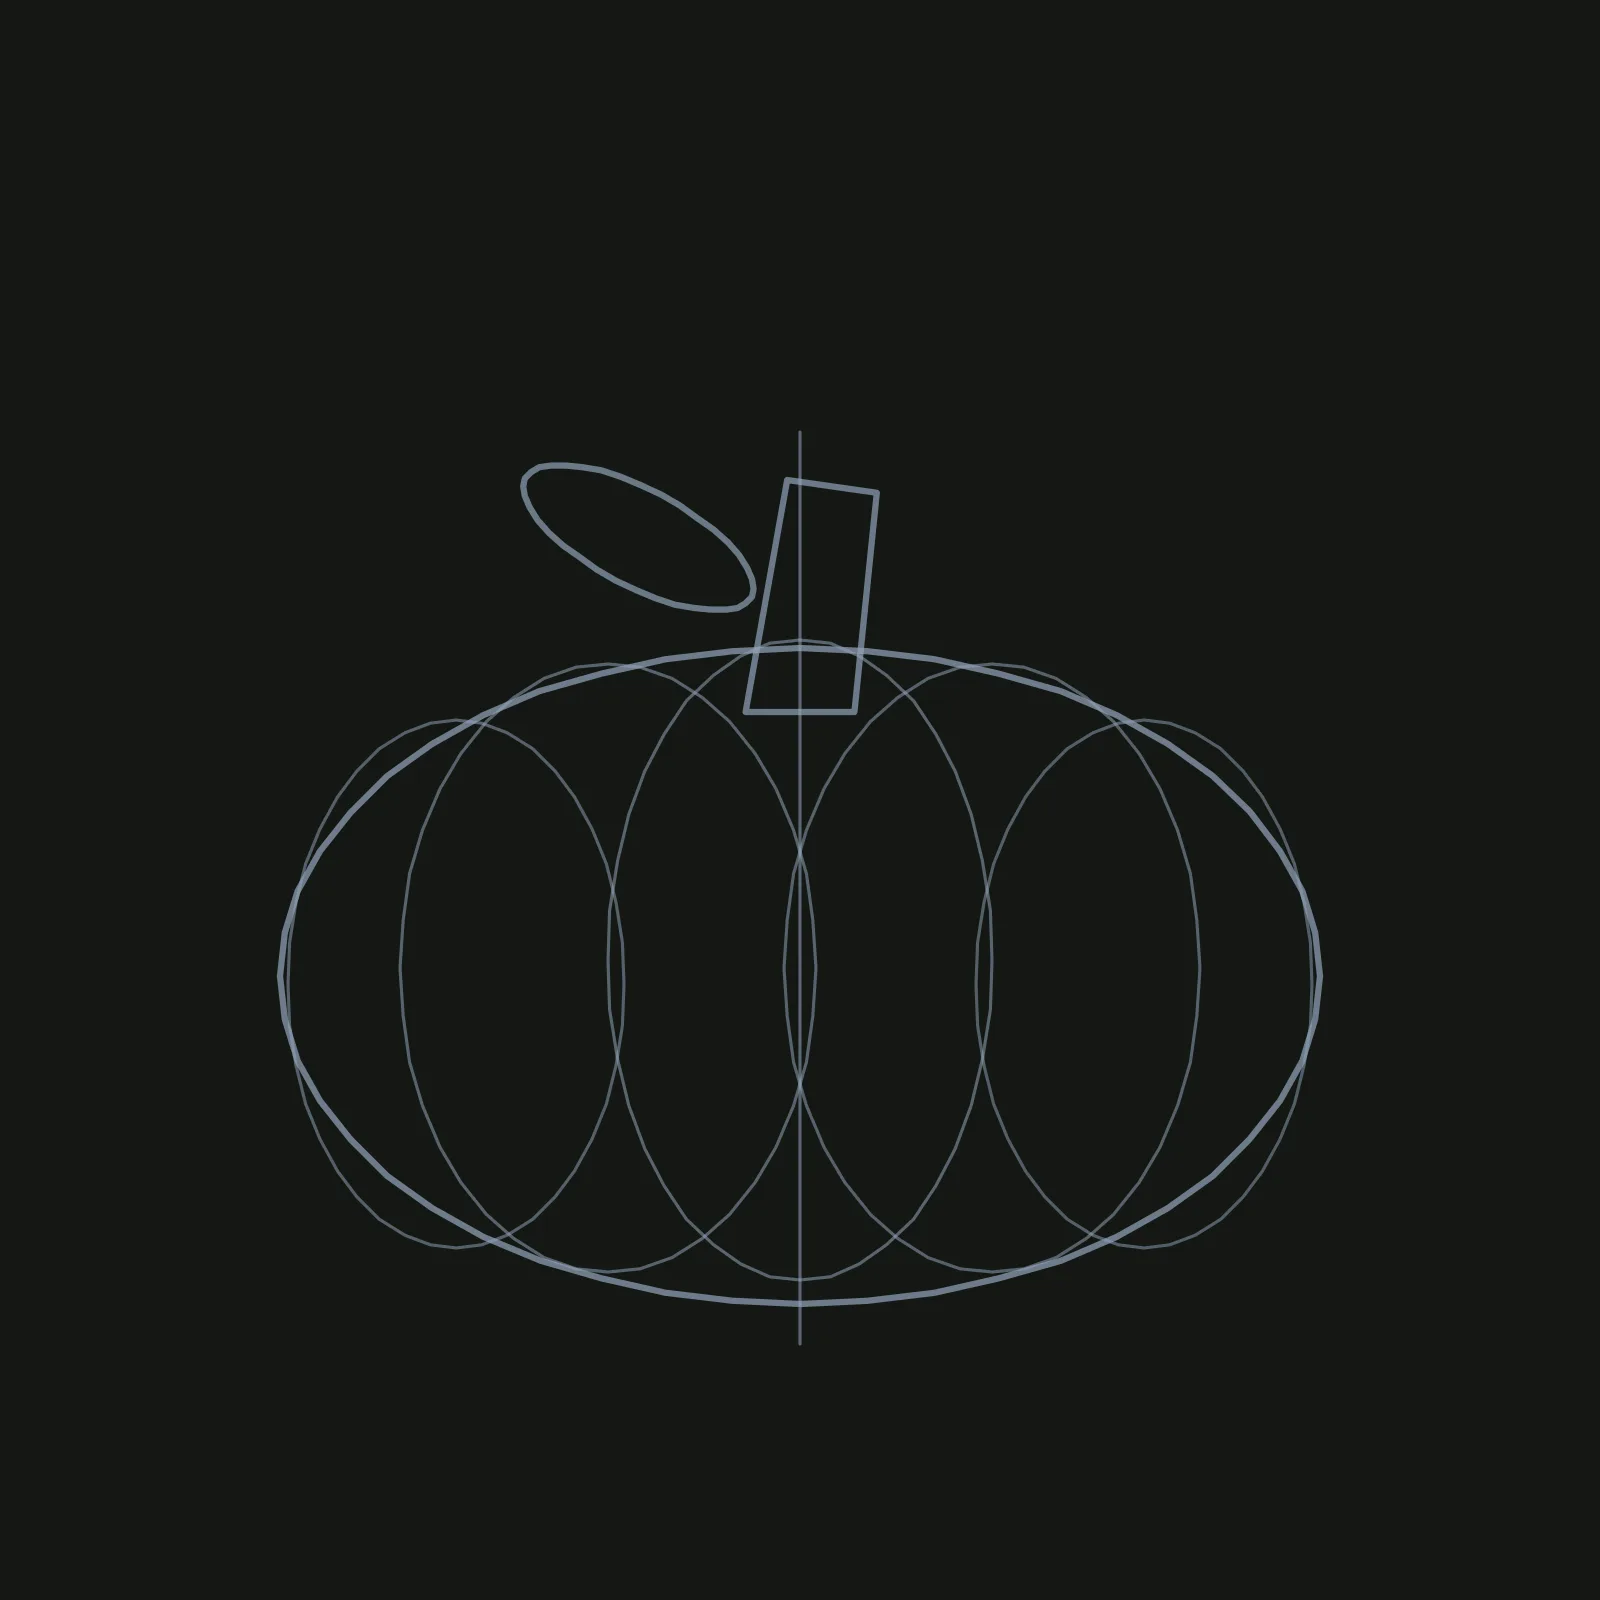
Switch to width 1 and draw a vertical line straight down through the middle of the stem. Now draw five tall ovals inside the body: one in the centre, reaching from the top of the big oval to the bottom, then one on each side overlapping it, then two smaller ones at the far left and right that are a little shorter. Let them overlap generously. Together they should fill the big oval like five eggs standing side by side.
The mistake people make here is leaving gaps between the lobes. They should crowd each other, because that crowding is what makes the ribs.
Step 3: Find the outline
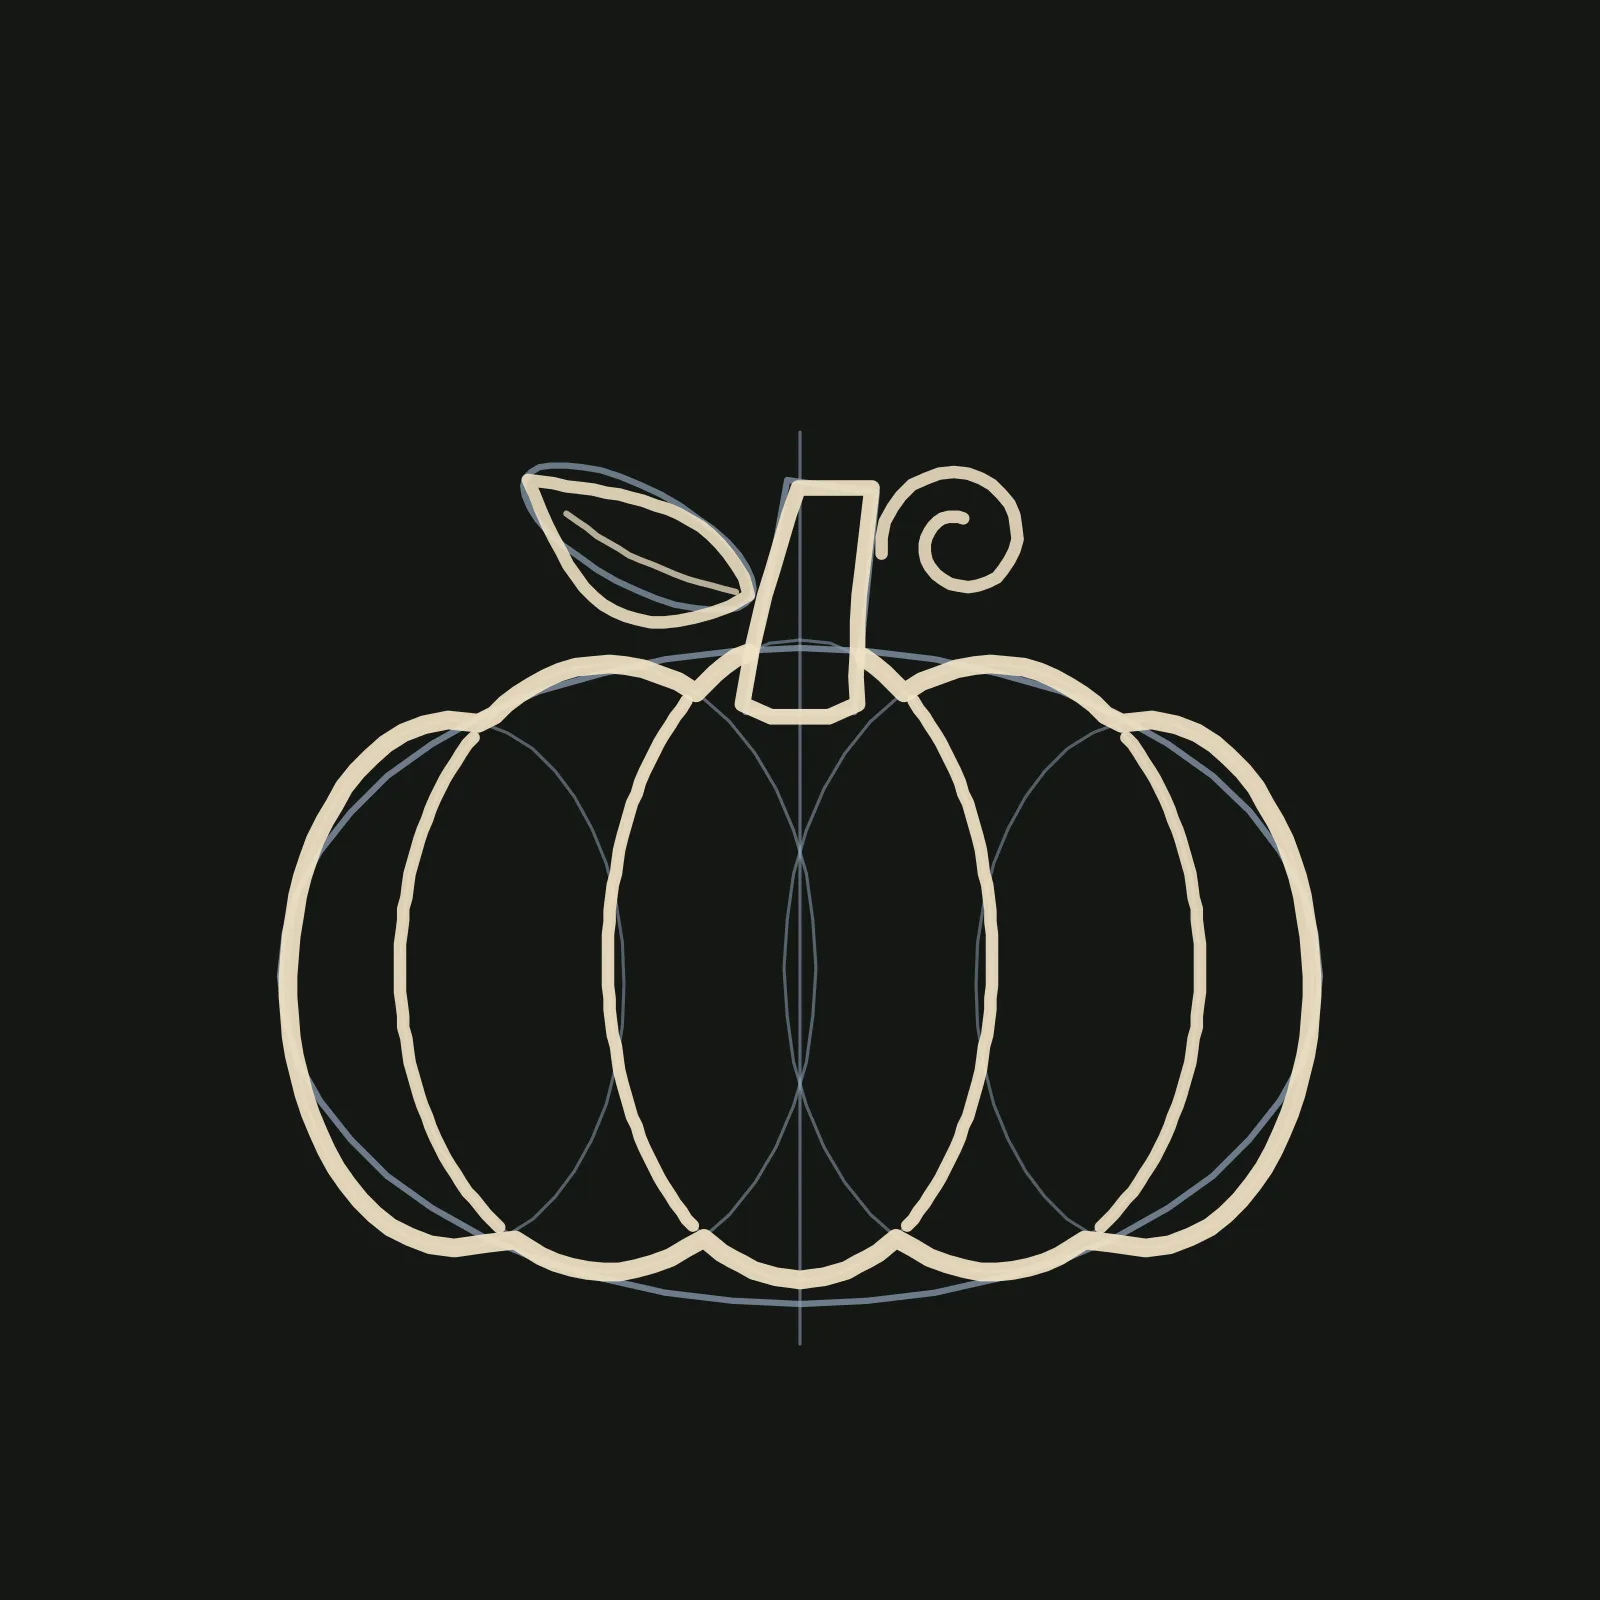
This is where it becomes a pumpkin. With the brush in warm cream at width 5 or 6, trace around the outside of your five lobes in one long line, starting at one side of the stem and finishing at the other. Let the line dip in wherever two lobes meet. Then draw the ribs a little thinner (width 4): the full left and right edges of the middle lobe, and the outer edge of each of the two lobes beside it. Stop each rib where it reaches the outline. Firm up the stem so it tapers toward the top, turn the leaf oval into a pointed leaf with a thin vein down the middle, and add a small curly tendril to the right of the stem.
The one mistake to watch: do not draw the outer two lobes' ribs. They are tucked behind the others, and their edges are already the outline.
Step 4: Add flat colour
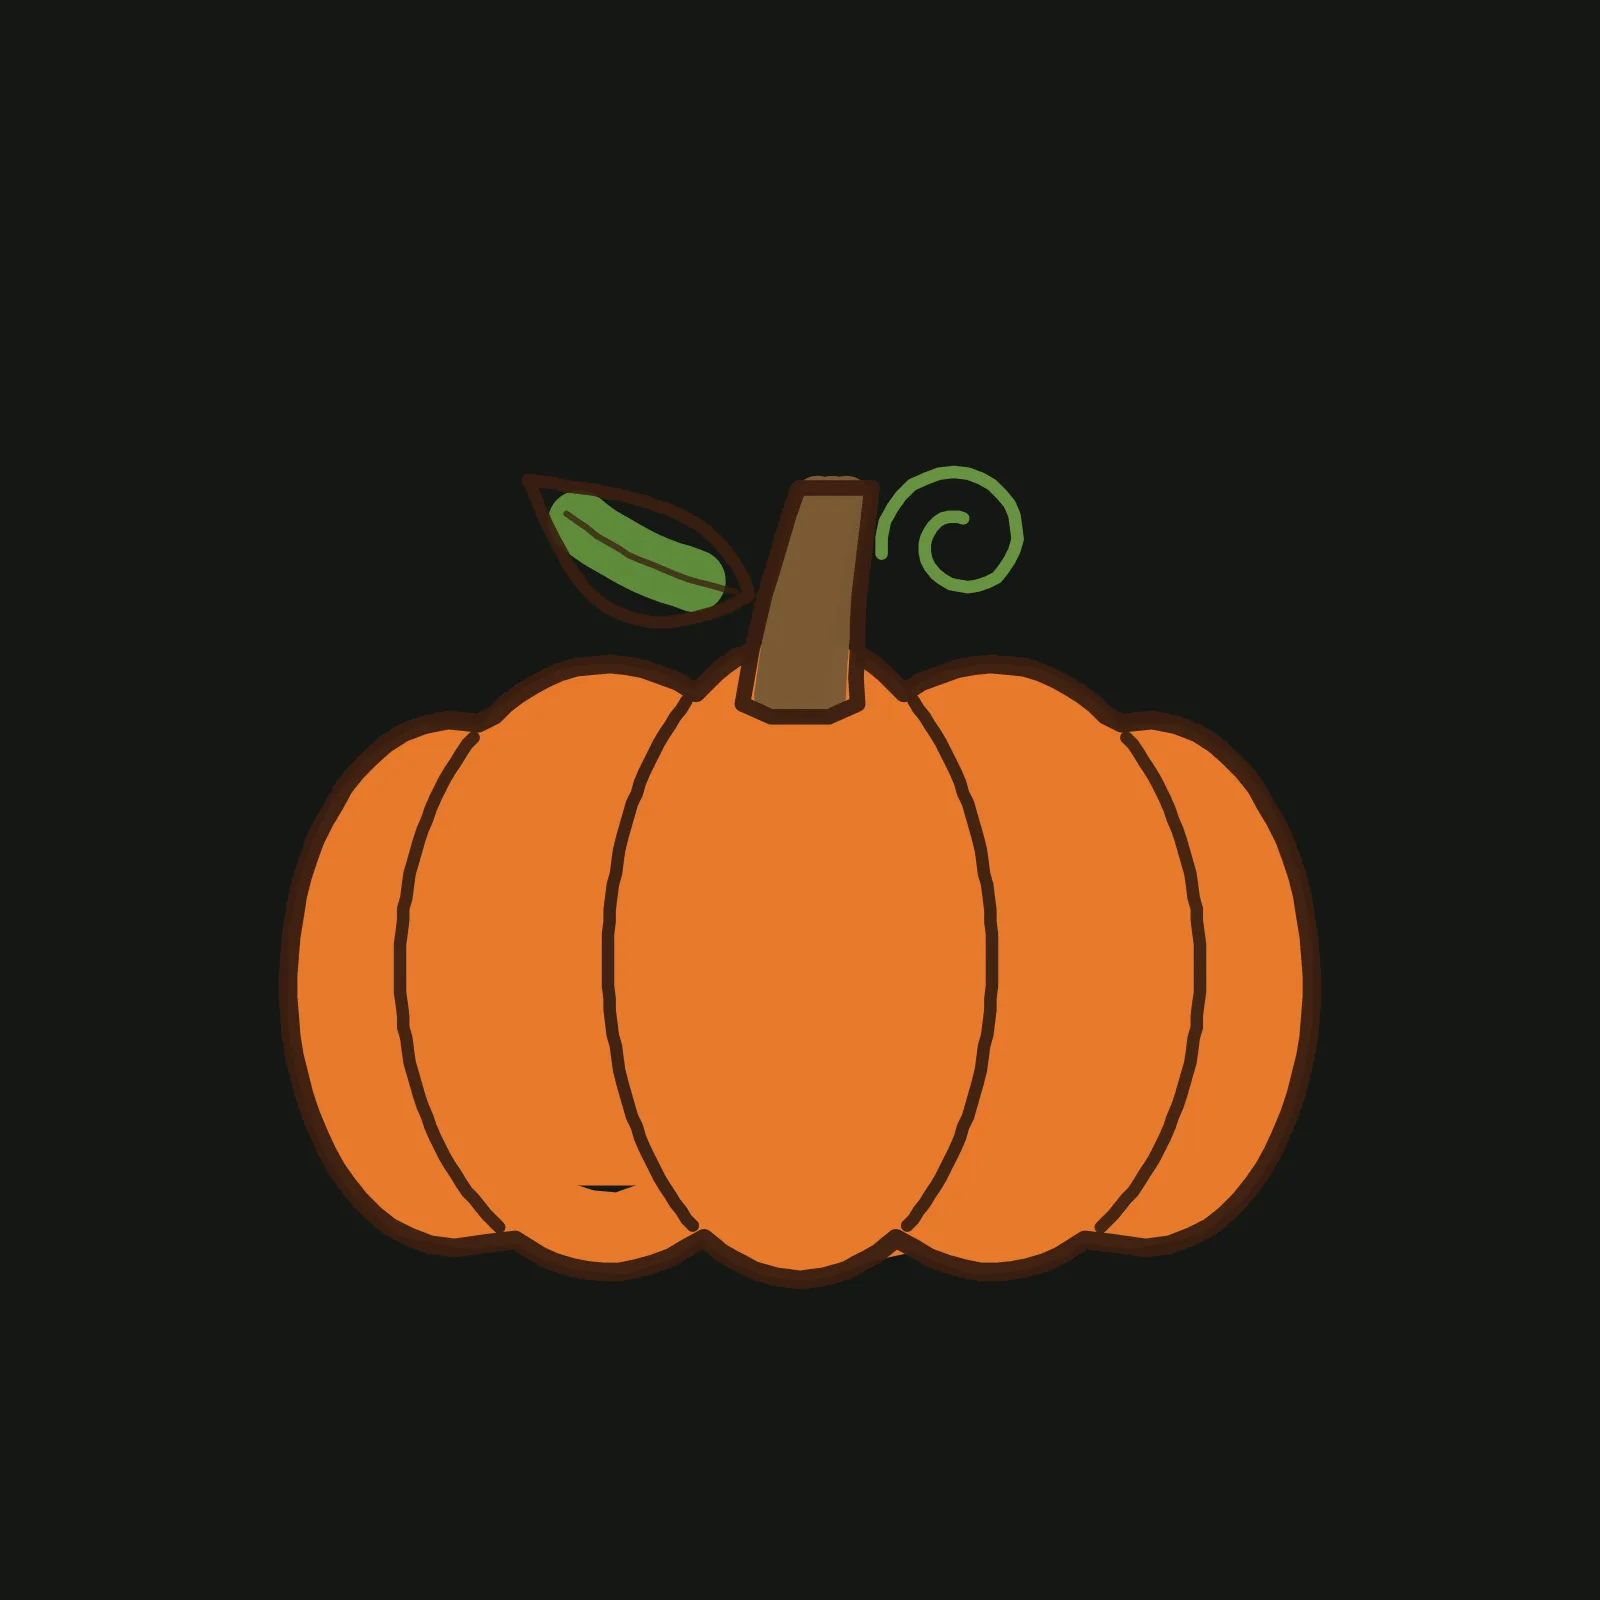
Erase the pencil guides. There is no fill bucket, so colour goes on like a marker. Take a broad brush in bright orange (width 25 or so) and run it once around the inside of the body, just inside the outline. Then switch to a wider brush (40 or more) and scribble back and forth across the middle until the body is covered. Fill the stem with brown in two or three strokes and the leaf with green in one stroke down its middle. Finally, redraw the outline in dark brown over the colour, and redraw the tendril in green.
The mistake here is starting the scribble right at the top. Your wide brush will spill out above the dips beside the stem, so begin a little lower and let the ring cover the top edge.
Step 5: Add one shadow and one highlight
Pretend the light is coming from the upper left. With deeper orange at width 18, draw one curved stroke just to the left of each rib and one inside the right edge of the rightmost lobe, following the curve. That is where the lobes crowd together and the light cannot reach. Then take pale orange at width 10 and add a short upright stroke on the upper left of the middle lobes. Give the stem a dark stroke down its right side and a light one down its left. Last, under everything, draw one wide, soft, dark stroke beneath the pumpkin so it sits on the ground.
The mistake is doing too much. One shadow and one highlight per lobe is plenty; a second layer of either starts to look muddy.
Draw it yourself
Now it is your turn. Open the editor on grovetracks.com and grow a pumpkin of your own. Try a taller one, a lumpier one, or a whole patch. If you want a head start, open any step's gallery page above and branch it to pick up from exactly that stage. Every step shows its lineage back to the first oval, and the finished pumpkin's Made from section walks the whole tutorial. For more on making a line do the work before colour arrives, see How to Draw Light in Line Art, and for how branching works, How to Remix Digital Art Online.